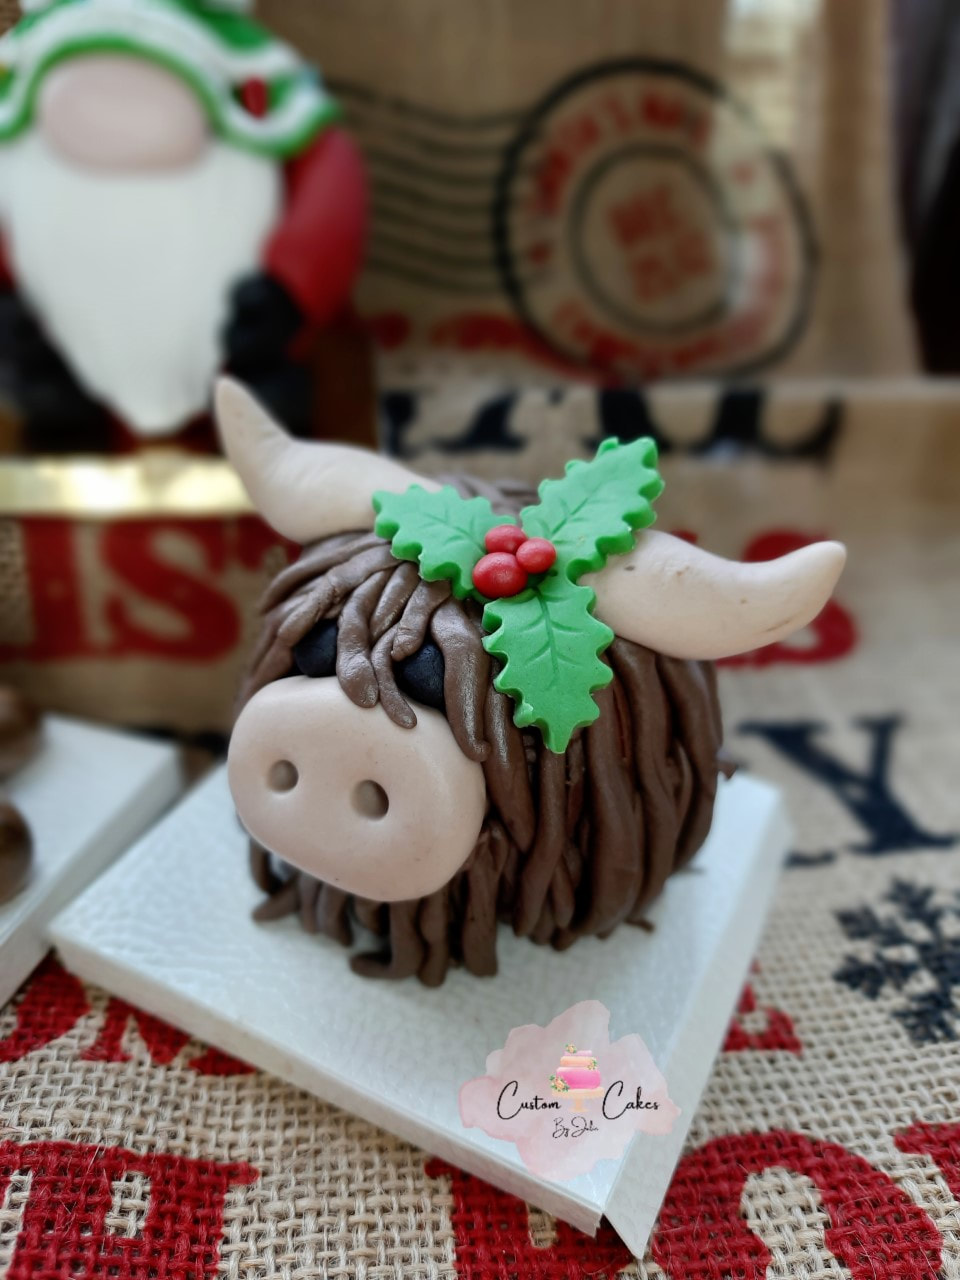
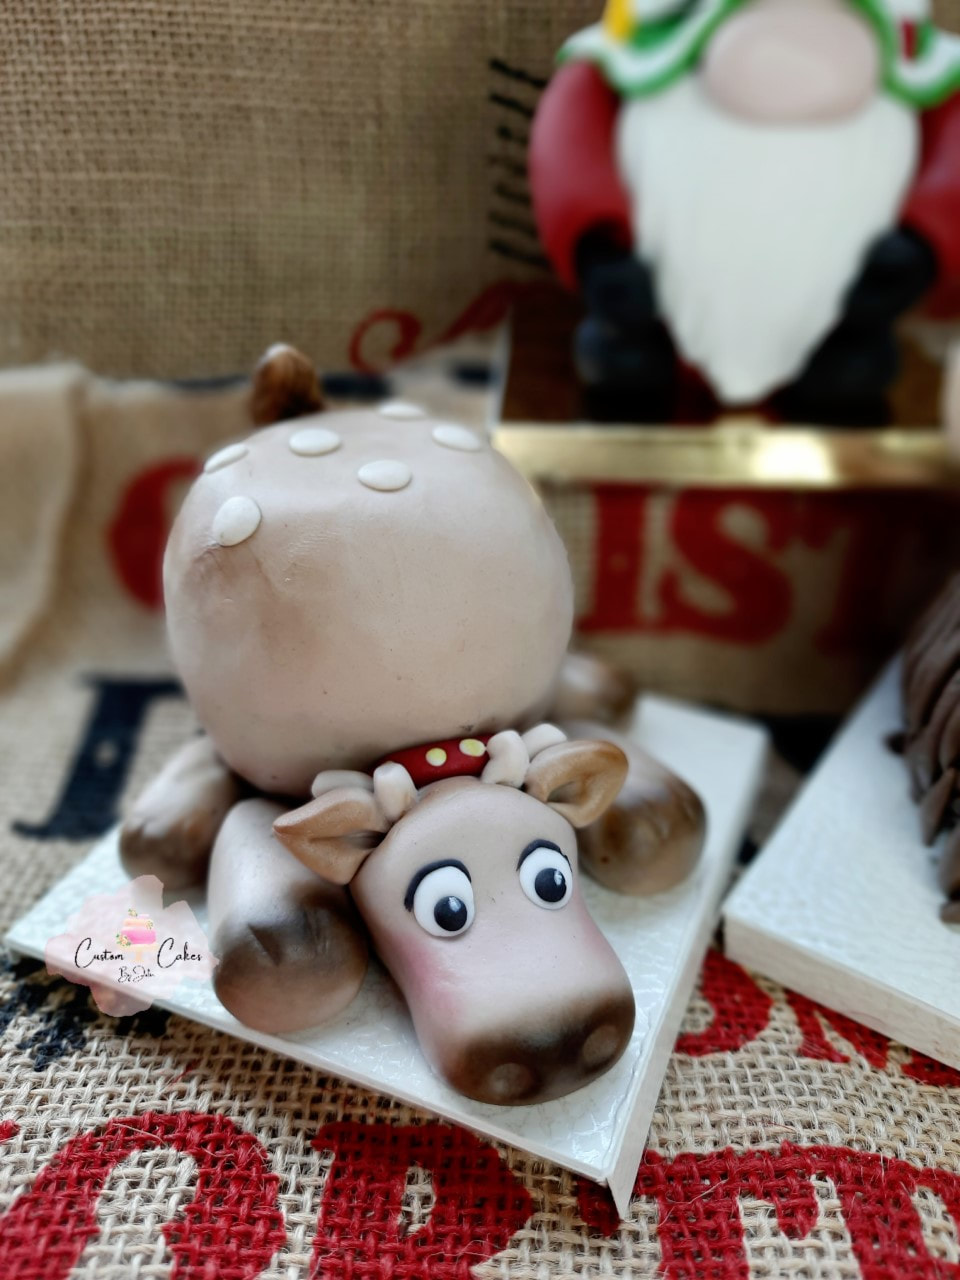
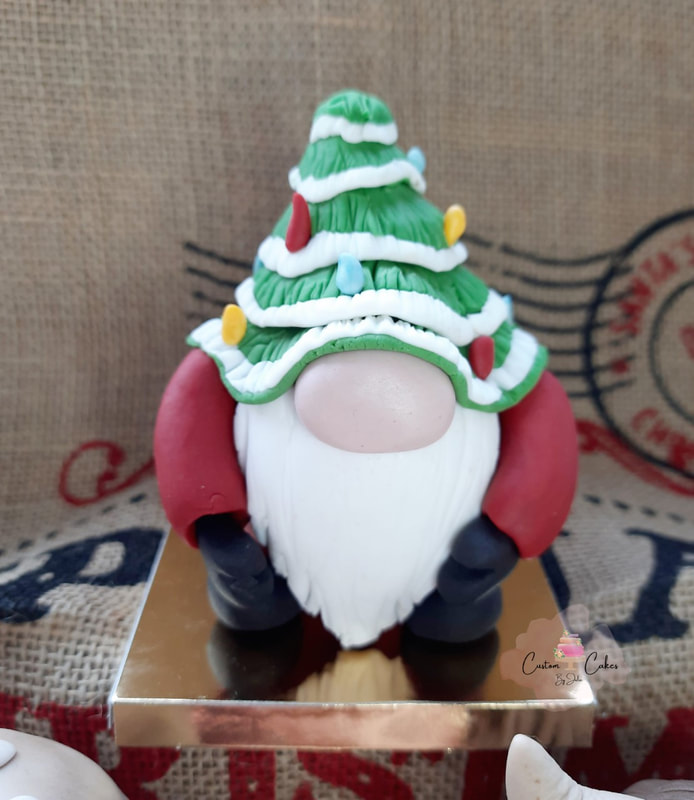
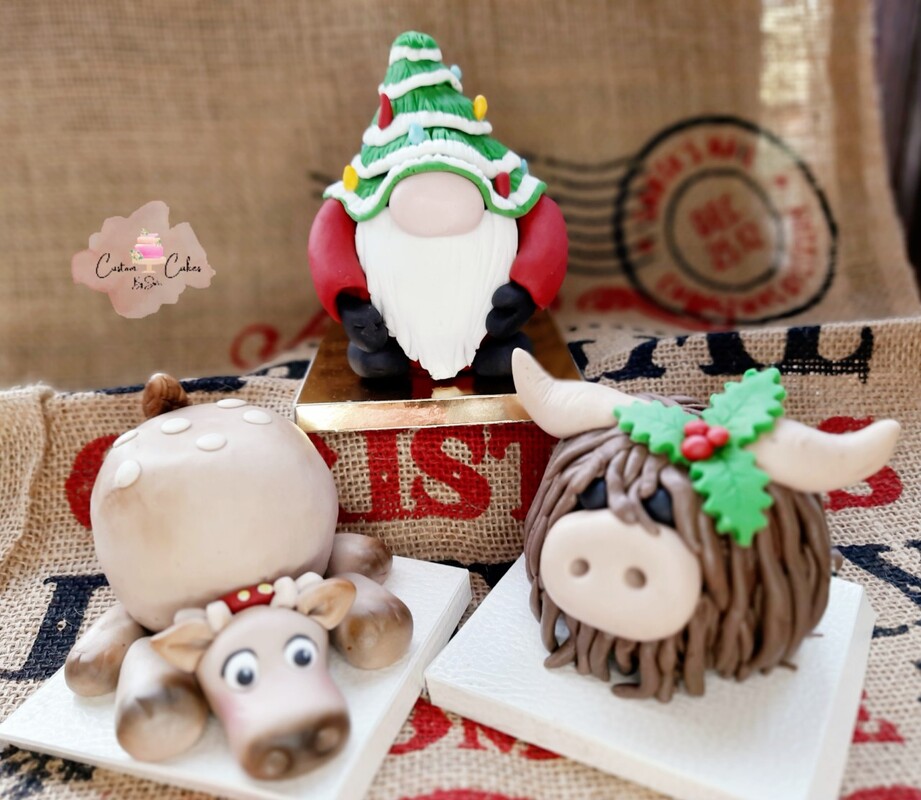
Creations Made At Our Last Meeting
2024
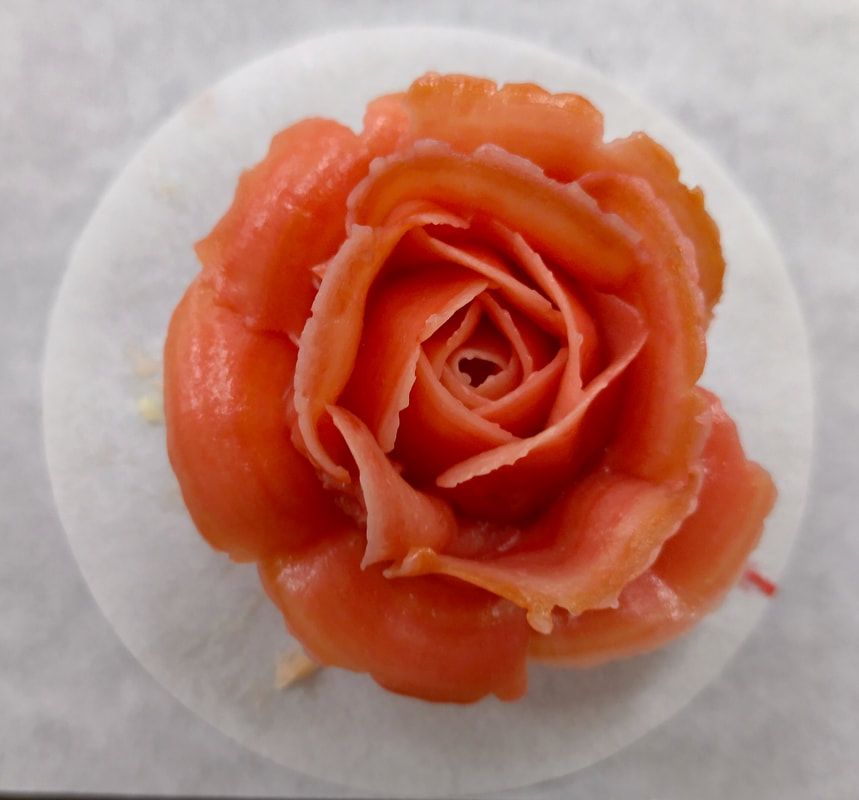
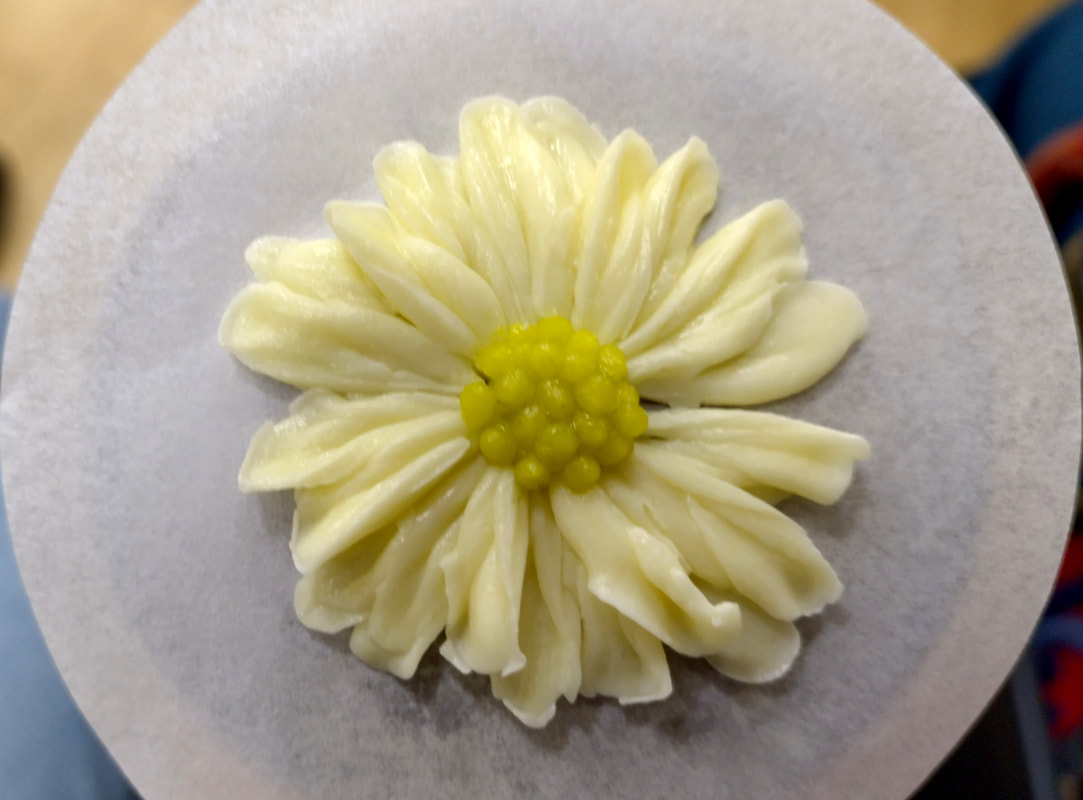
In our March meeting we had a lovely demonstration from Nikki Atkinson on buttercream flowers. This buttercream has a higher content of butter to normal butter icing so that it doesn't crust over.
The nozzles or a particular shape to create the petals, wider at one side than the other. The circular non stick paper is placed on an icing pin with a small amount of buttercream. These pins make it easier to twirl the flower around when piping. For the roses a small cone is shaped first, the other petals are piped up an over action on one side, and overlapping the previous one. three first row, the three or five for the second and next rows.. The daisy and other flower are piped more of a flat petal with and up and down action.
If not quite right, the best thing is you can scoop it up reuse and try again.
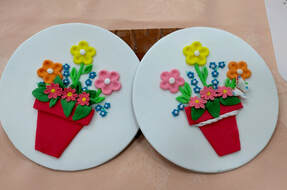
At our February meeting we had a workshop on creating our own 3D plaques, some made pots of flowers, others were getting ahead and doing Easter plaques.
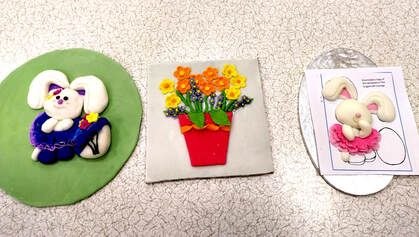
Our first meeting in January 2024. We had a great demonstration from one of our members Julie Jackson on 3D plaques.
She used just sugarpaste as no structure has to be on wires. First she made a flower pot by rolling an oblong and then trimming the sides. Then a piece for the top of the pot. Any kind of cutters, any shape you like were used for all flowers and marked with various indents using a bone tool. Followed by thin strips for the stalks. All these are put on before the top of the pot to hide the ends. Place the pot edge on and add the leaves, these can be cut free hand or cut from any small cutters you have, not necessarily a leave cutter and drape over the edge. These lovely patterns can be on a plaque or straight onto a cake (Easter) or on a chocolate egg.
She used just sugarpaste as no structure has to be on wires. First she made a flower pot by rolling an oblong and then trimming the sides. Then a piece for the top of the pot. Any kind of cutters, any shape you like were used for all flowers and marked with various indents using a bone tool. Followed by thin strips for the stalks. All these are put on before the top of the pot to hide the ends. Place the pot edge on and add the leaves, these can be cut free hand or cut from any small cutters you have, not necessarily a leave cutter and drape over the edge. These lovely patterns can be on a plaque or straight onto a cake (Easter) or on a chocolate egg.
2023
|
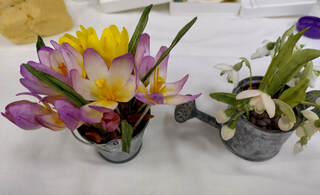
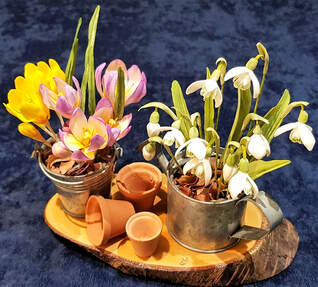
Last of our meeting this year. Our Nov meeting we had Judy Banks making Crocus and Snowdrops.
|
|
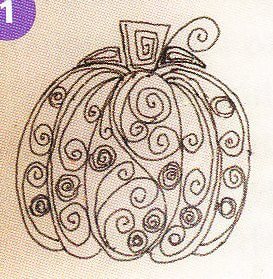
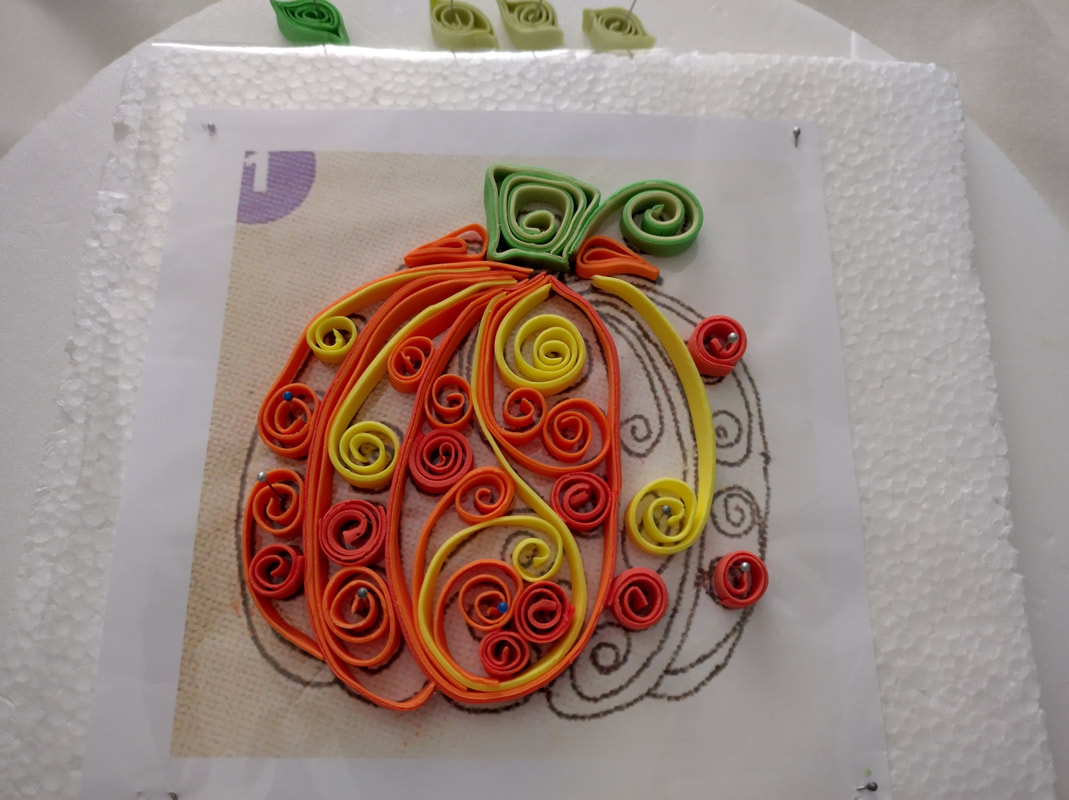
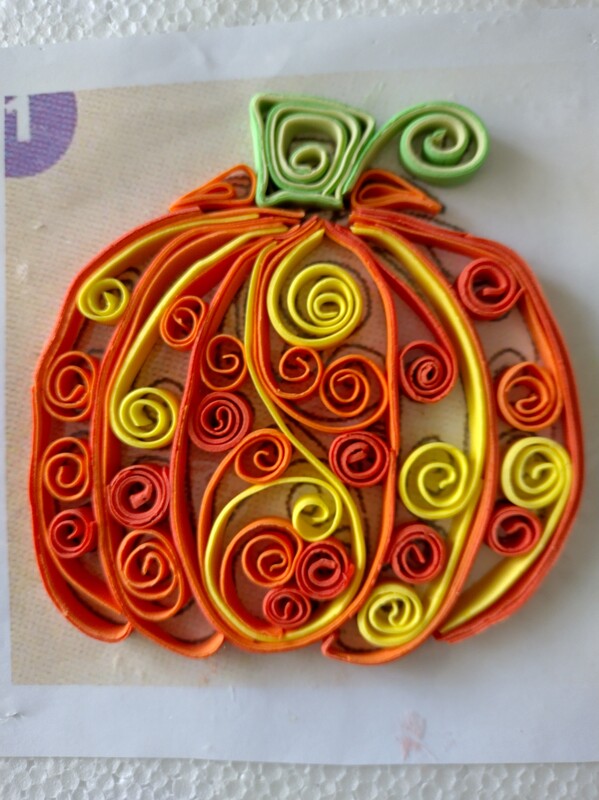
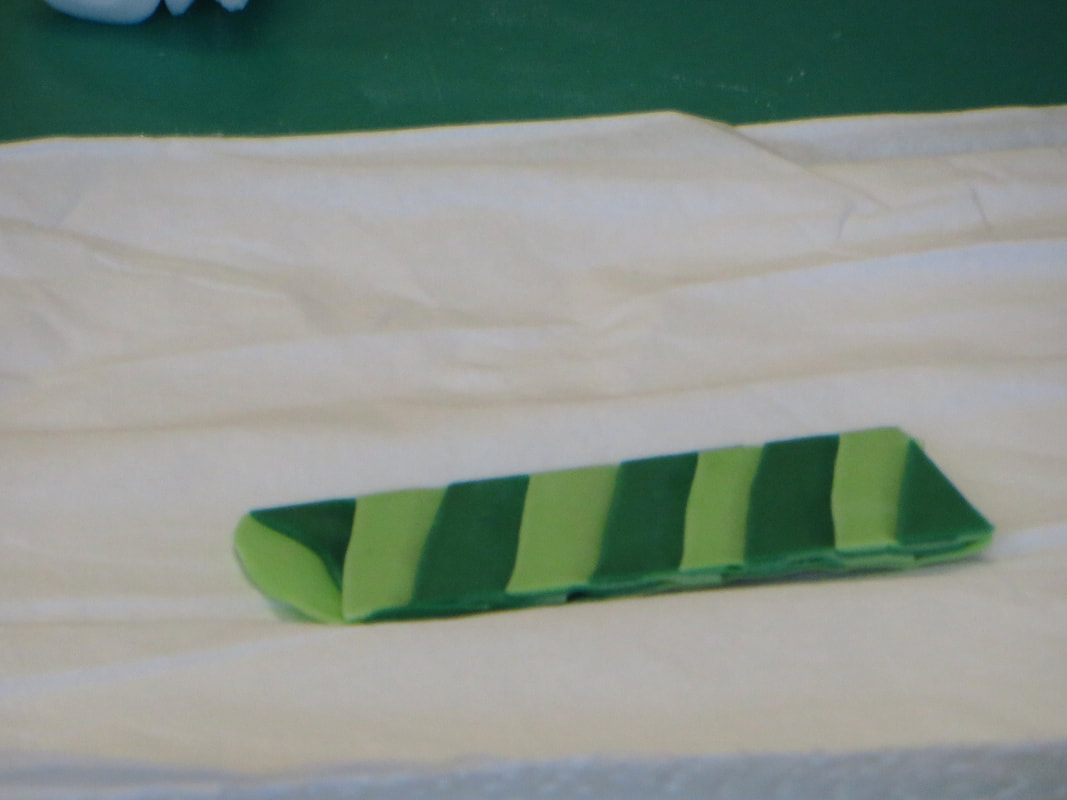
On our Oct meeting we had a workshop doing our own quilling pieces, everyone had a great day trying out a new technique.
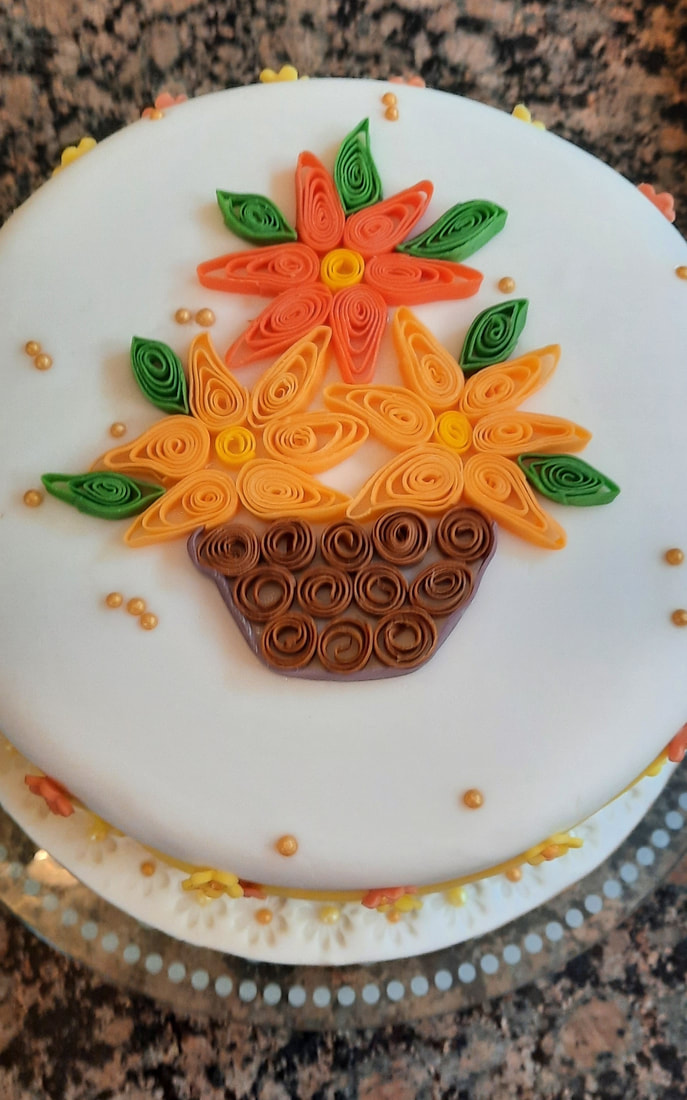
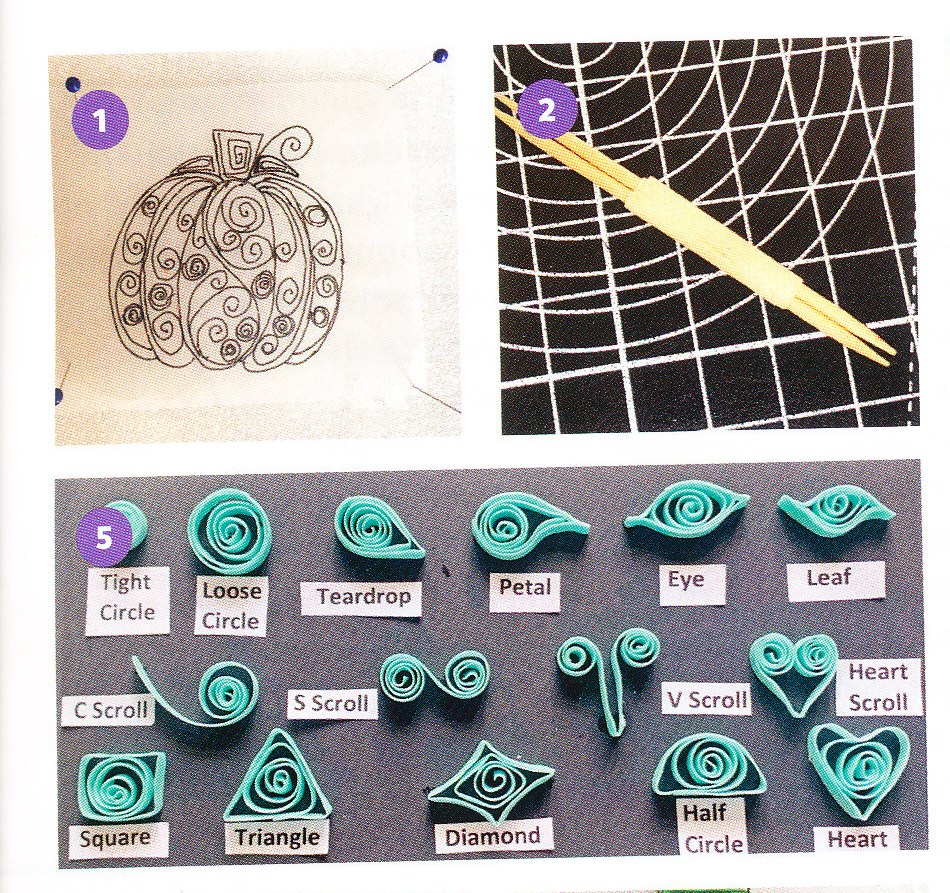
At our Sept meeting we had Stephanie Hall showing how to do Quilling in sugarpaste.
This can be done with any of the paper quilling patterns you can get.
Firstly place the pattern on some thick polystyrene and the place some thin film over the top, secure with some masking tape or pins.
Most patterns only take small amounts of paste about a walnut size. The pumpkin pattern was originally only 7.5 cm, but I increase it to 13.5cm for demo purposes.
Roll the paste very thinly and cut into 5mm strips. this can be done with a herb cutter if you don't have a sugarcraft tool. Take 2 cocktails sticks (stand them on end to get a level) and tape together 2.5cm from the table. Take a piece of cut paste and stand it on it's side, place the tips of cocktails sticks over the end and twist to form a spiral circle, glue or use water to secure end.
There are various shapes to make, loose circles, tight circles, teardrops, petals, eyes, 'C' & 'S' 'V' 'Heart' scrolls, diamond, hearts, squares, triangle, leaf and half circle.
Make the circles first and place on pattern, when firm or dry remove, and continue to work shape from the middle out. Use sugar glue to connect them together. When completely dry transfer to cake.
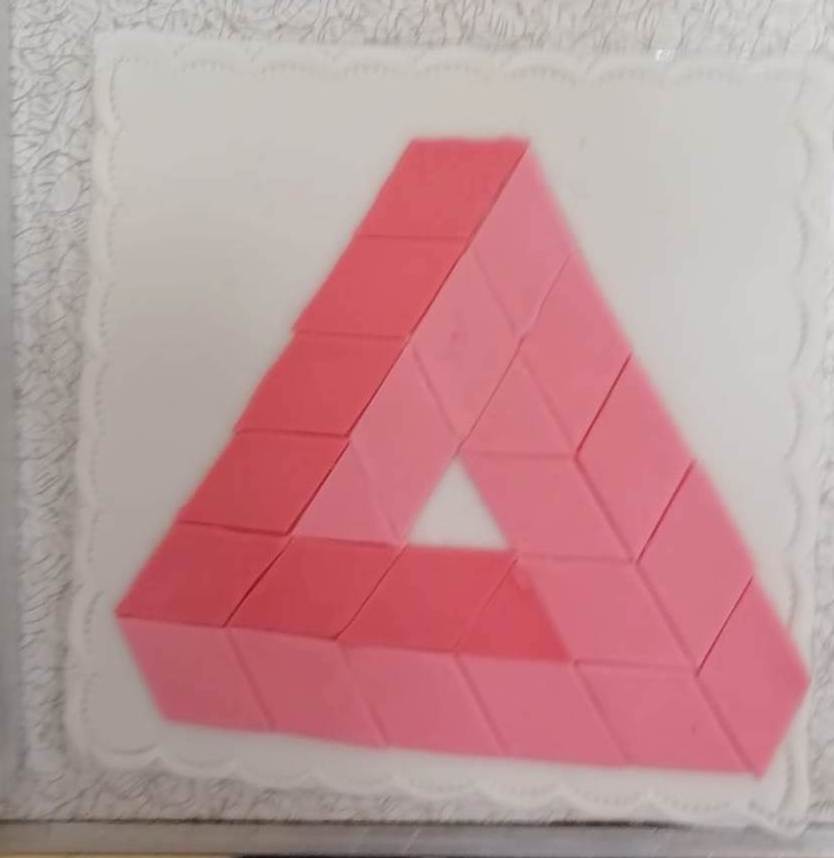
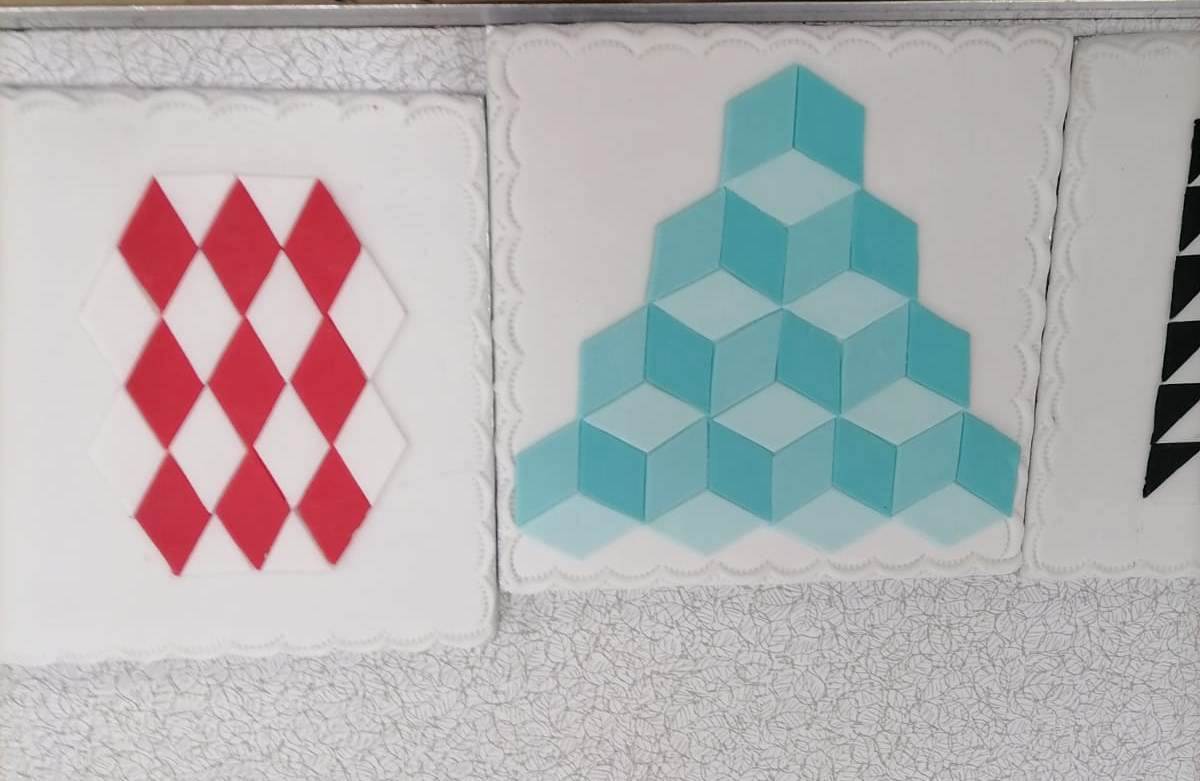
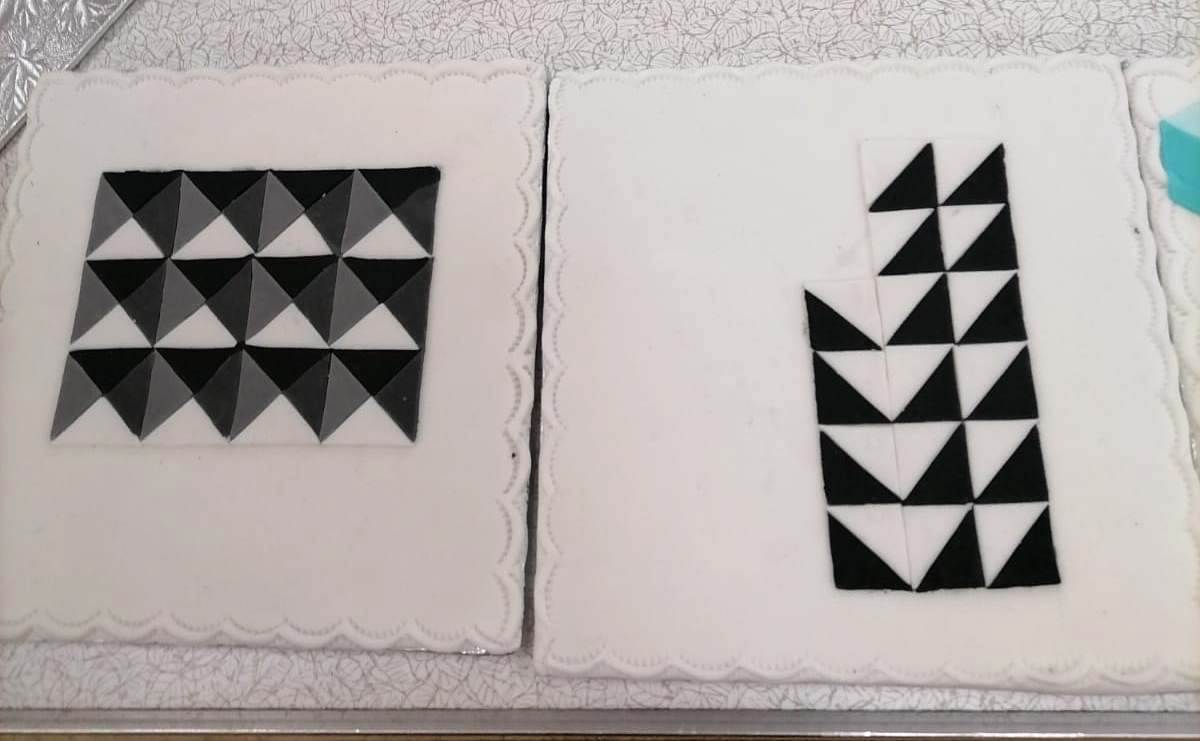
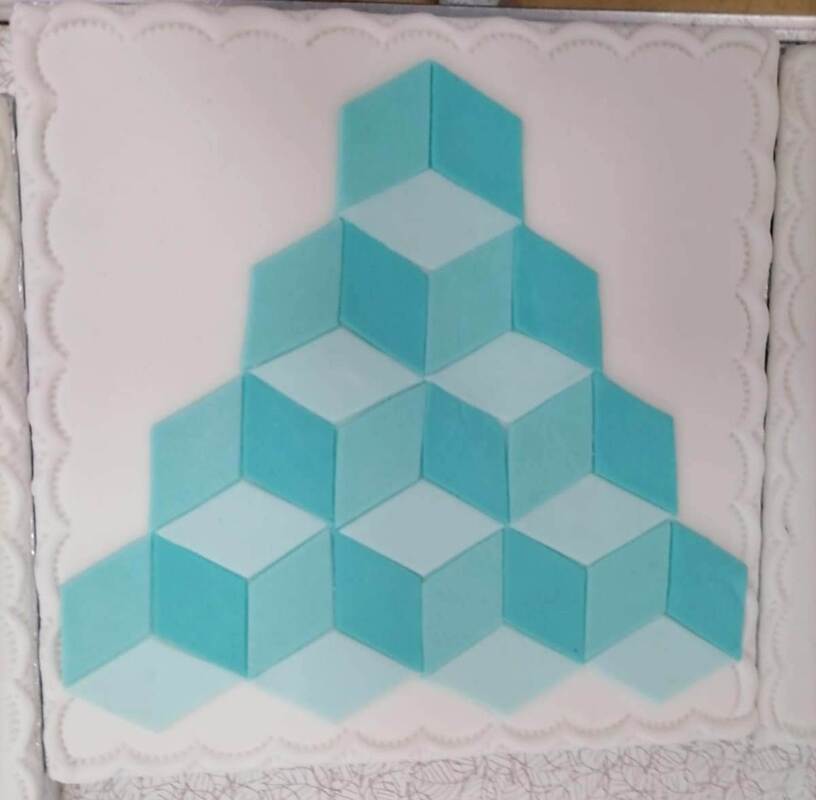
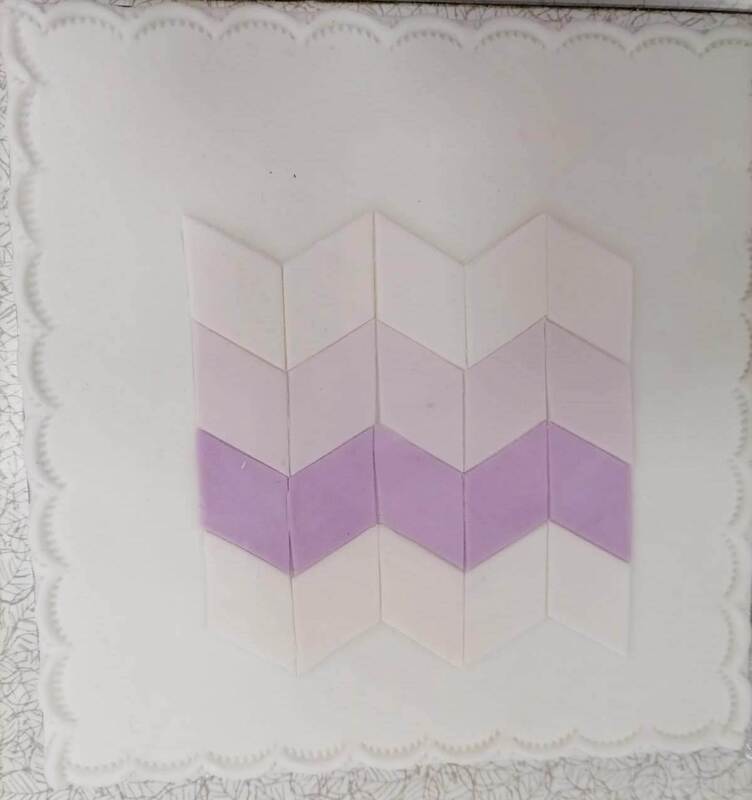
In our July meeting we had a workshop doing geometric patterns that were shown to us last month. We all had a great time, once we got our heads around it. One of our members did some very different ones by cutting the shapes in two, good job, very effective.
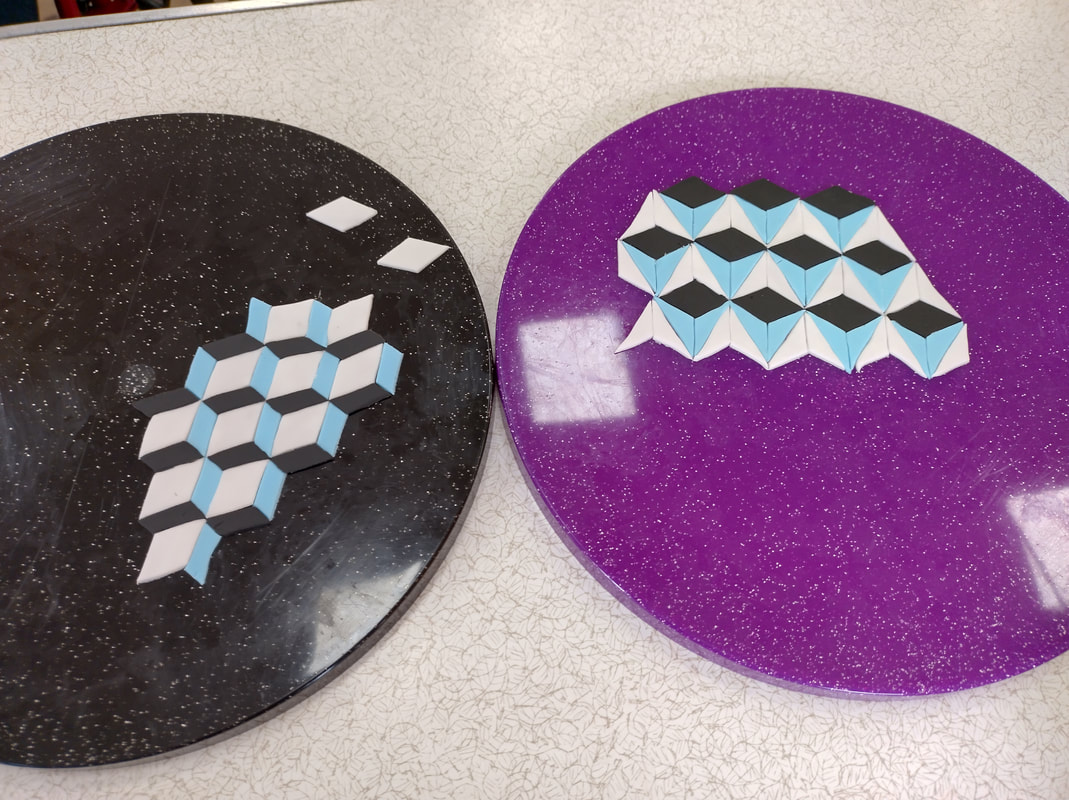
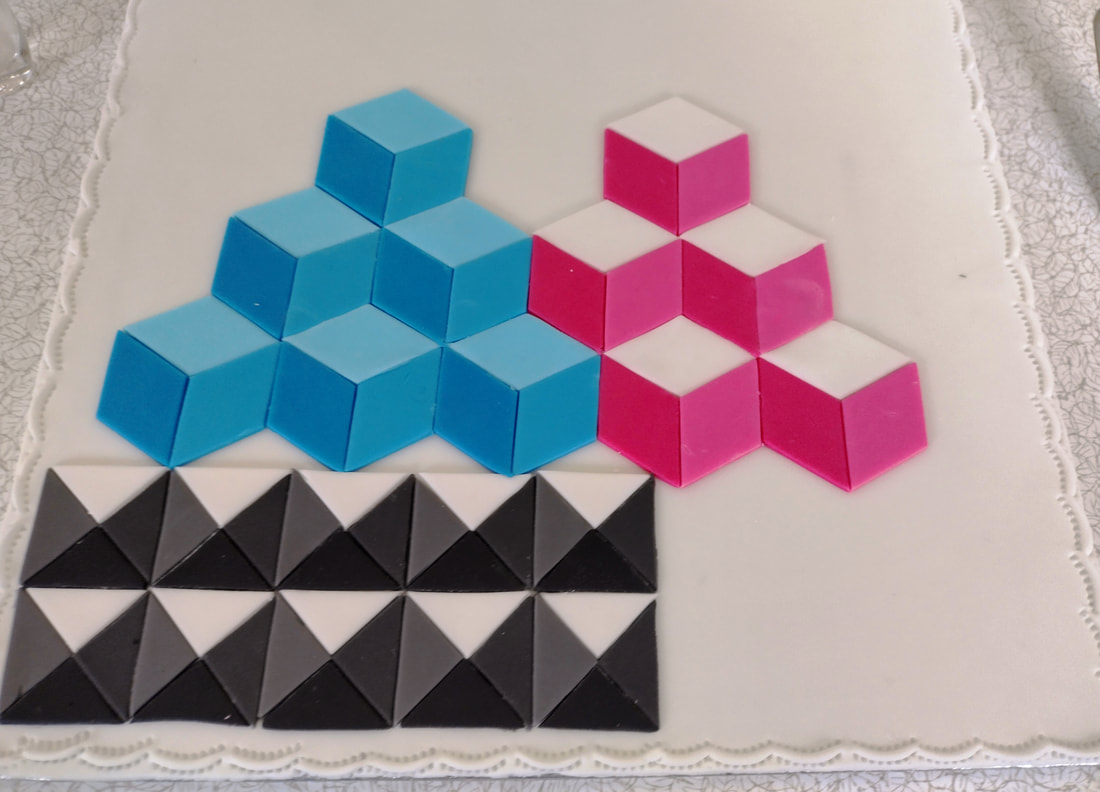
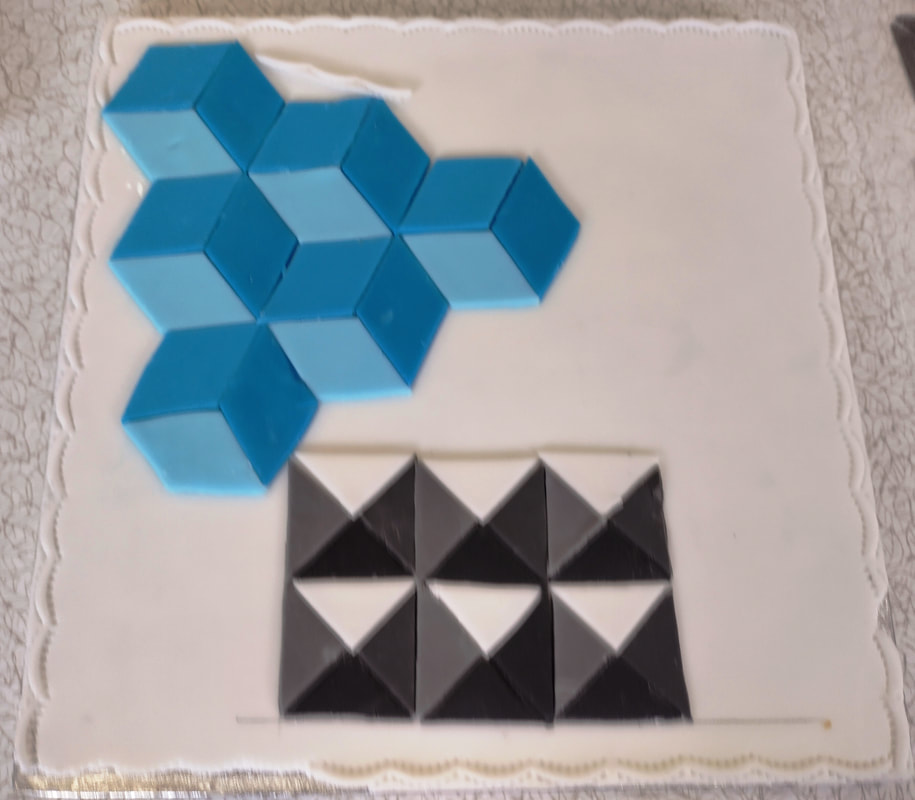
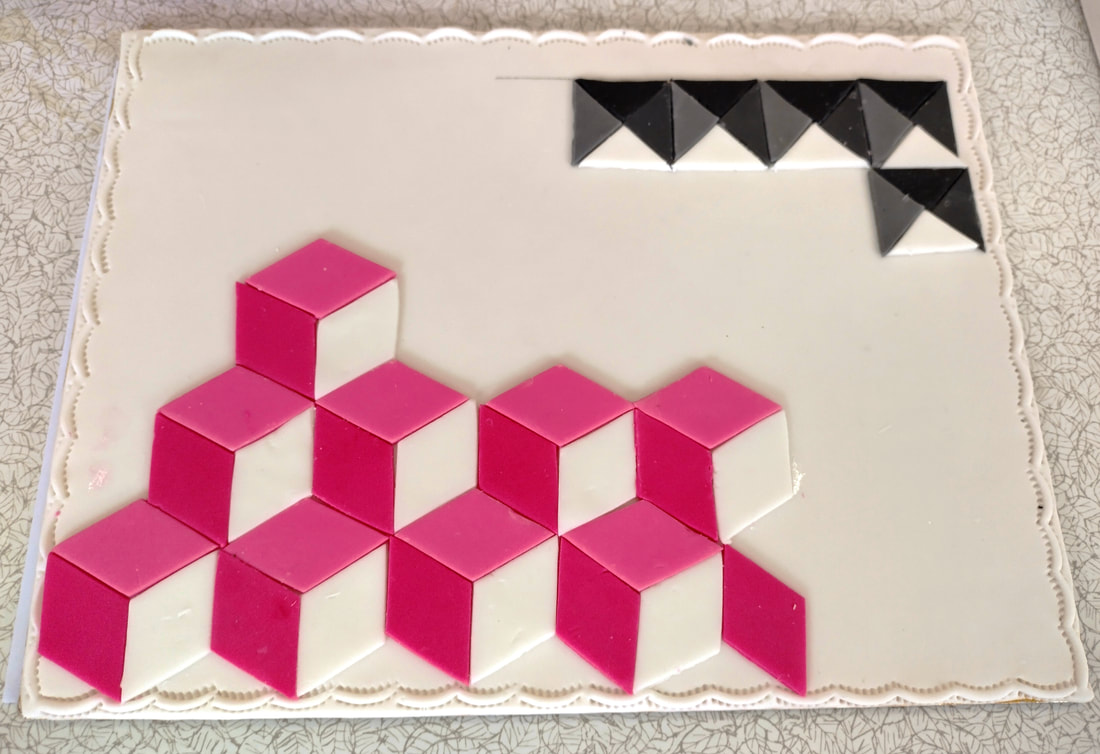
Our meeting in June was a great one. Geometric designs. With paste stiffened with a little tylo powder, square and diamond shapes were cut, allowing the dry a little to keep shape. Start on a scribed line on the icing to keep a straight line. place diamond short side pointing up and out, place the next the other way to form wings. The next goes on the top, do in different colours to make the effect of a box.
The squares were done the same, but some squares are cut into small triangles.
The squares were done the same, but some squares are cut into small triangles.
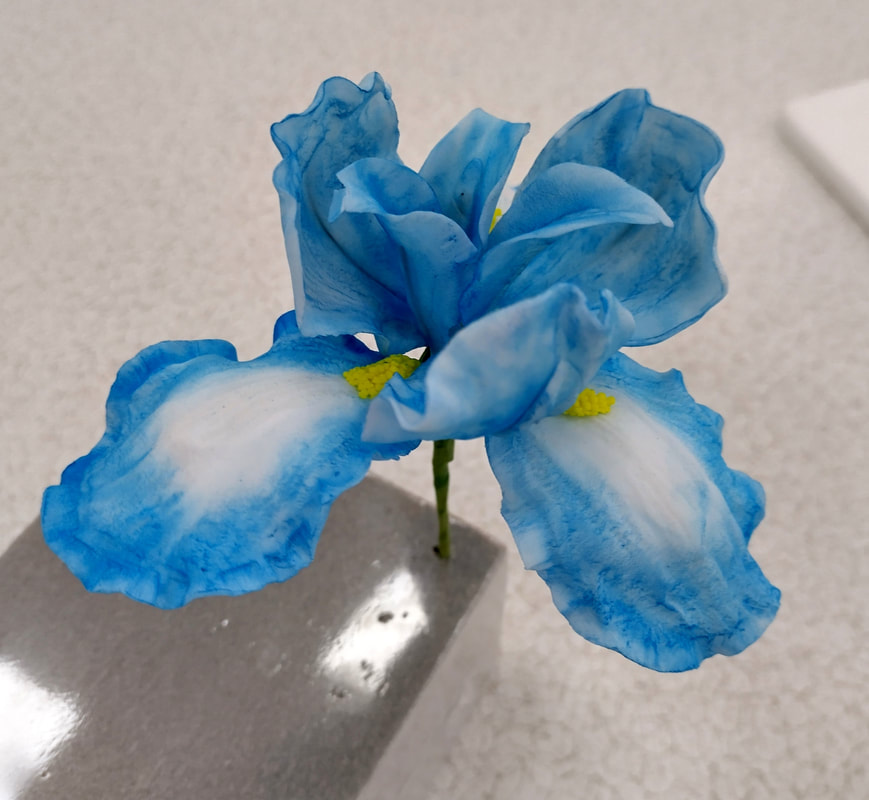
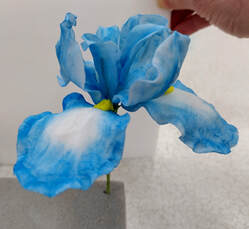
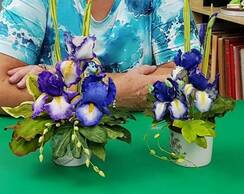
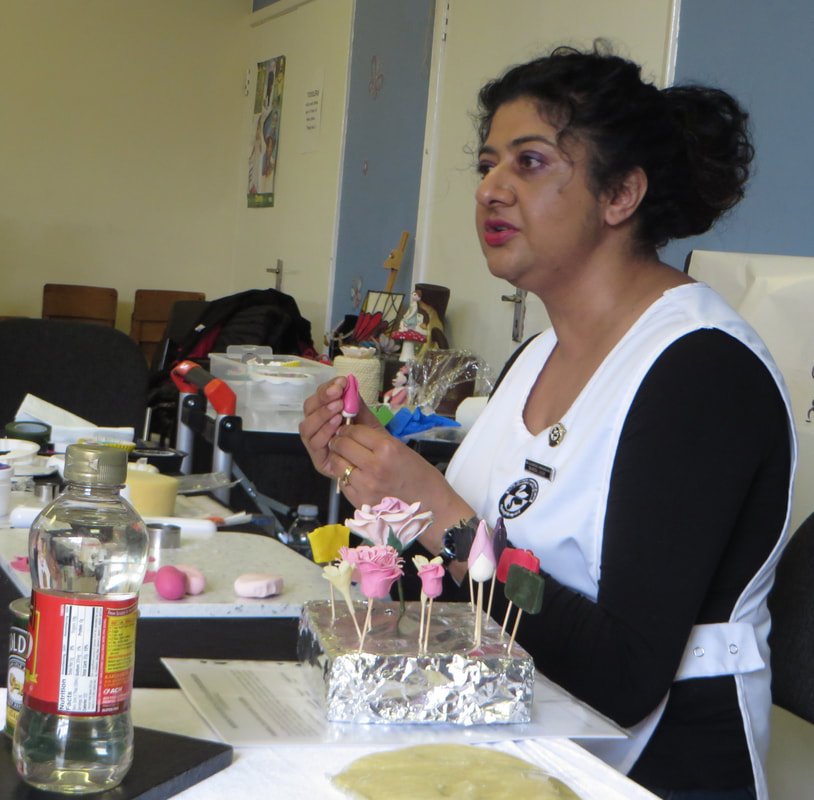
We had a workshop in May and our members made an iris flower with the instruction from Lesley.
First using a leaf cutter, cut 3 leaves & put on 28 gauge wire, frill edges, central vein and curve inward but out at the top.
Next cut 3 large rose petal shapes, use 26 wire, thin and frill edges, colour edges and cup inwards.
Then cut 3 slightly larger rose petals and use 26 wire, thin, frill and colour edges and cup back on themselves downwards.
Tape the first 3, tips outwards, next cupped petals, then the downward cup petals.
Put some yellow paste through a sieve and roll together to form a sausage and stick the downward petals, near the stem, down the centre.
|

|
|
At our April meeting we had the very talented Lesley Dalton making an Iris flower, beautiful work.
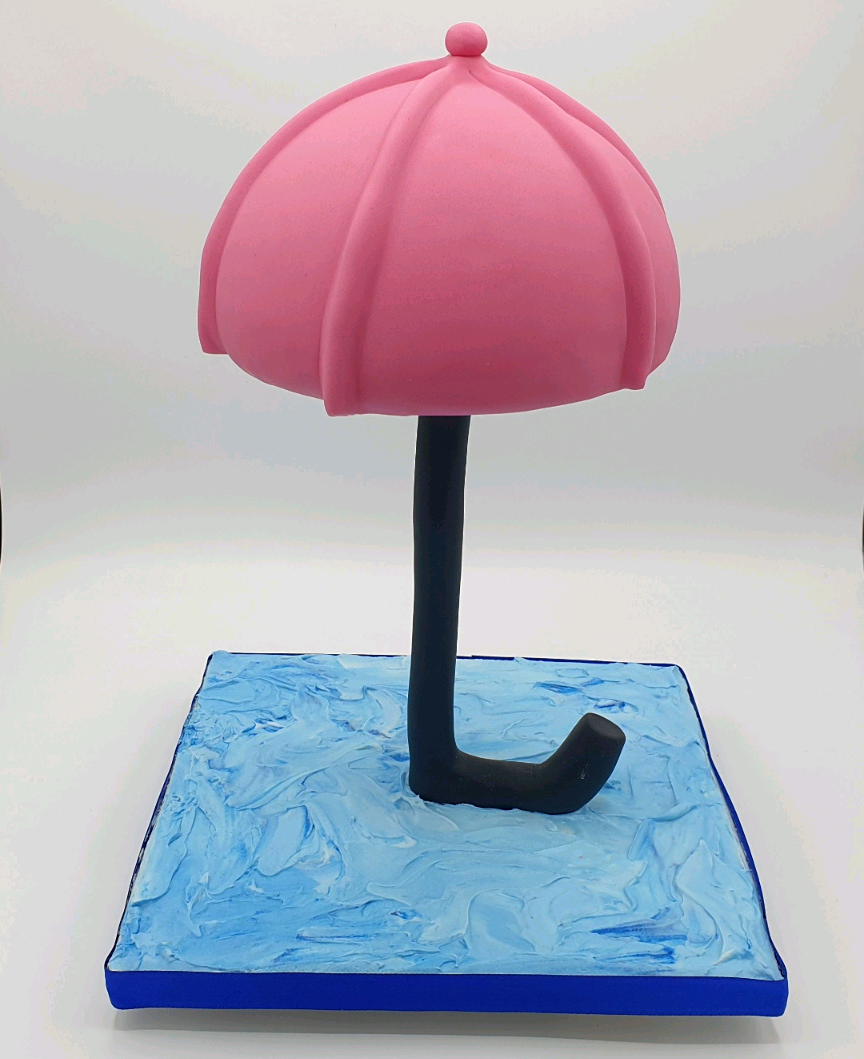
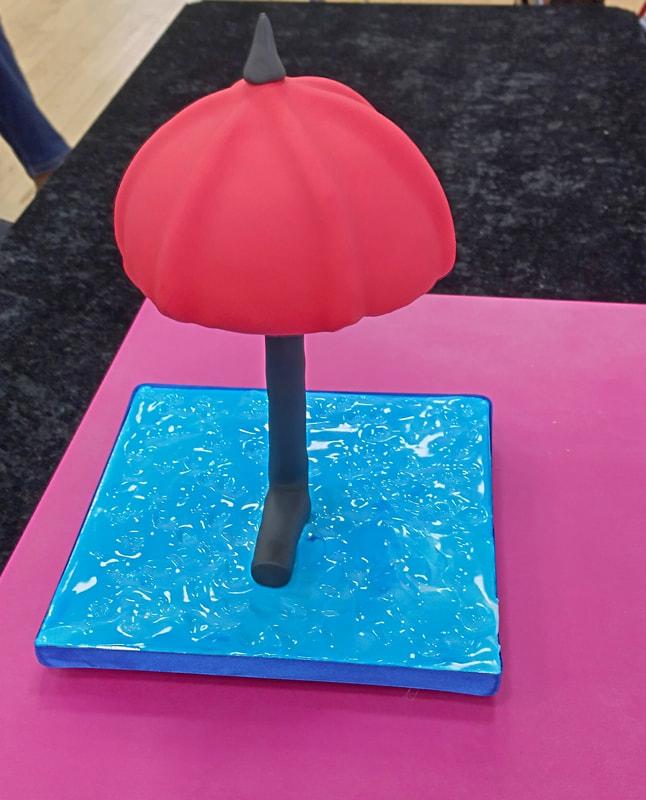
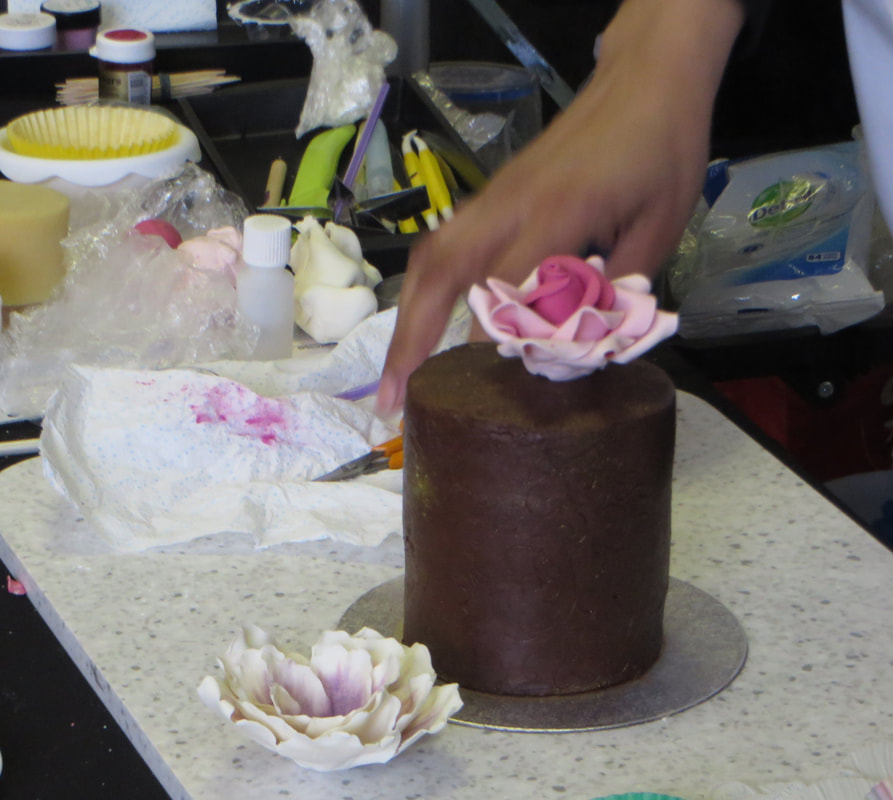
We had a great March meeting by Julie Rogerson showing us the mechanics of how to structure a gravity defying cake. She used a metal rod secured to the plywood board base with washers and nuts, a second cake board was then secure further up to hold the cake. All parts were taped with food safe tape. The cake was then placed on the top board and thin rolls of paste placed over the top to form the spines of the umbrella, then fully covered. The handle was a long sausage of paste cut half way through and put around the pole with a turned up bottom the form the handle. A point or button on the top and royal icing around the base completed the effect of rain.
A wonderful demonstration, we all had a great time and learnt such a lot.
A wonderful demonstration, we all had a great time and learnt such a lot.
In our February meeting our chairperson showed how to make an Easter pastillage card.
Some people had not made pastillage and were told that if you make a royal icing mix and add CMC or Tylo powder to it, it become thick and pliable, it can then be rolled and cut to make various shapes, it dries very hard.
Two rectangles were cut for the card, one was dusted to look like stones on a church, a stain glass window was piped on. She had made a range of sugarpaste flowers, daffodils etc, these she attached along the base as if they were growing below the window. A very attractive scene, when dry made a snails trail of icing down the left side of the card and attached the other rectangle so the card would stand. Everyone really enjoyed the demo.
Sorry no photos
Our new years meeting in January started with our members making their own Peony flower. We all had a great time, catching up, making petals, dusting them and giving each other tips on the best way to wire the flower together. A very social afternoon was had by all.
At our last meeting in Nov we had Judy Banks showing us how to make a Peony flower, such a beautiful flower.
First she showed us how to make the centre buds and colour the stamens yellow and wire them together. Then she cut out the petals with a large rose cutter and attached to a wire, she then left to dry while making others, then dusted them, a little yellow at the base then pink 2 thirds up the petal. With semi dry petals the flower can be wired together, this was done so that the petals mould to fit together better at the base of the flower. The next row of petals were slightly larger.
We had such a good time, we will be making the Peony ourselves next meeting on Jan 21st 2023.
In our October meeting we had a lovely demonstration on how to make Miniature Flowers. Great work. She showed how she makes the centres of the flowers, and even tapes tiny stems on, after firstly adding pollen and dusting it yellow (could hardly see it) but how clever to work so small. She then made small petals and wired them on. Making small leaves as well, then wired them all together to form a spray. We could see why she had won many competitions with her work.
|
|
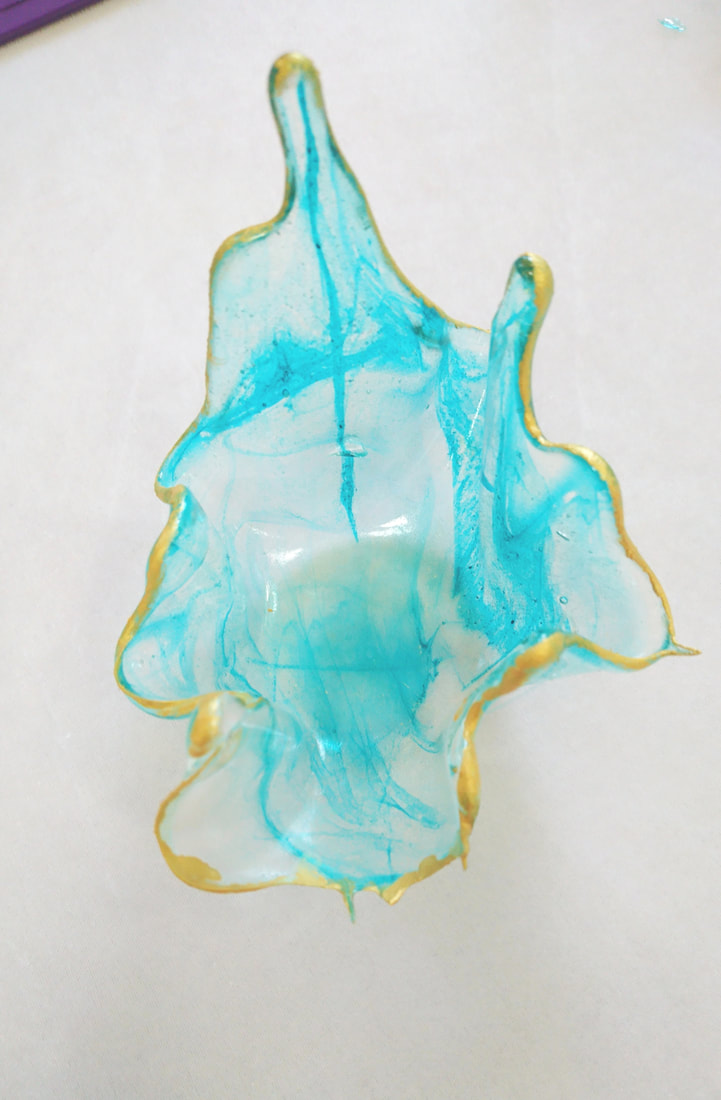
In our September meeting we had a go at making our own Isolmalt items, great experience, we thought we made quite a good job on the bowls, not as perfect as Sahedas, but learnt such a lot by doing it for ourselves. |

Our July meeting was a great success with Saheda Lally showing us how to make Isomalt items, first was a vase.
As this substance is very hot to work with, she gave us instructions on what to us on our hands, cotton gloves then on top of those rubber gloves or special thin rubber gloves.
Everything that the Isomalt comes into contact it will stick unless it is on silicone jug, mats, moulds etc.
First, she melted the Isolmalt in the microwave, waited till the bubbles go then added some colour to swirl in it. She then it poured onto a silicone mat, waited till it had cooled a bit, then put the whole mat over an upturned jug to get a fluted shape. This was left to cool.
She then went on to pour some liquid in silicone moulds for gems, pearl beads etc.
When the vase had cooled she took it carefully off the mat, what a great piece of work.
The edges were painted gold to enhance the effect.
Wonderful work.

Our June meeting was a great success with us all having a go at making a Clivia lily ourselves, see below.
We used the Platinum paste that the demonstrator had suggested last month.
Everyone went home with their creations. It has been a long time since many of us had made flowers, so it was good to get some practice in. We were all please with the result and the bonus was we all had a good chat catching up again.
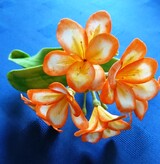
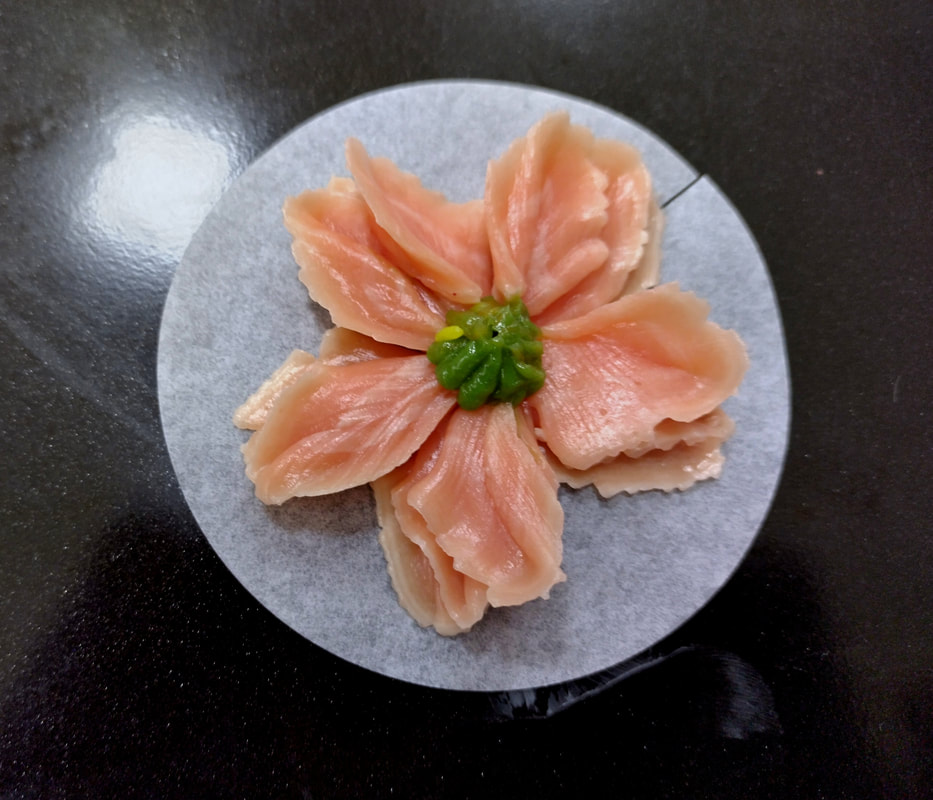
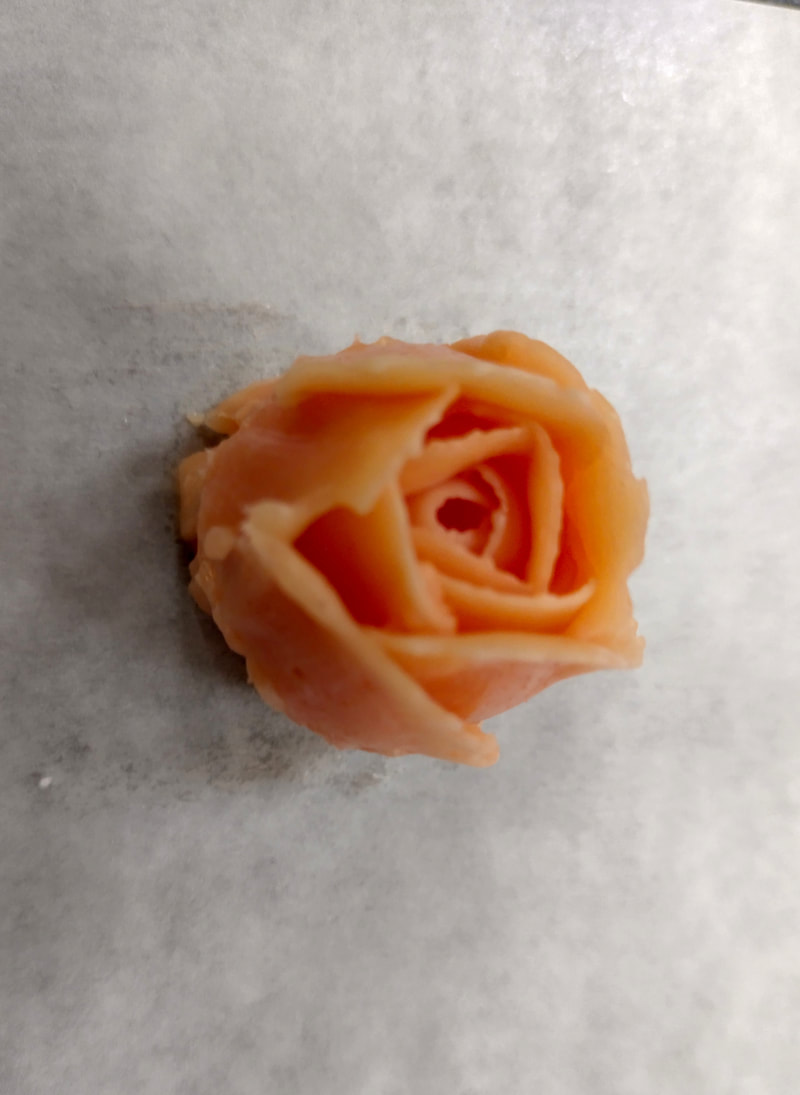
At our May meeting we had Lesley Dalton from the Harrogate branch demonstrating how to make a Clivia Lily. First she told us about the cutter, which was adapted from a metal rose cutter, as there isn't an official cutter available. She slightly squash the sides to make it narrower.
3 stamens were folded over to crate 6 and taped to a wire. She cut 6 petals, coloured yellow up the centre and orange around the edge. 3 were taped on first, with the other 3 between the gaps of the others.
These lilies have quite a few heads all creating one large flower, so continue for as many as fill fit. They are then all taped together. Leaves are broad and rounded at the end and sets of two grow down the stem.
We all thought it was such a good flower to make , we are going to do one for ourselves next month.

Our April meeting was a great success with our branch having a hands on workshop royal icing cookies and making models like the ones shown in the march meeting. The cookies were gingerbread mixture.
Many of the members had not done much royal icing so was a chance to brush up on it.
Many of the members had not done much royal icing so was a chance to brush up on it.
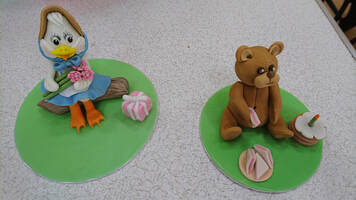
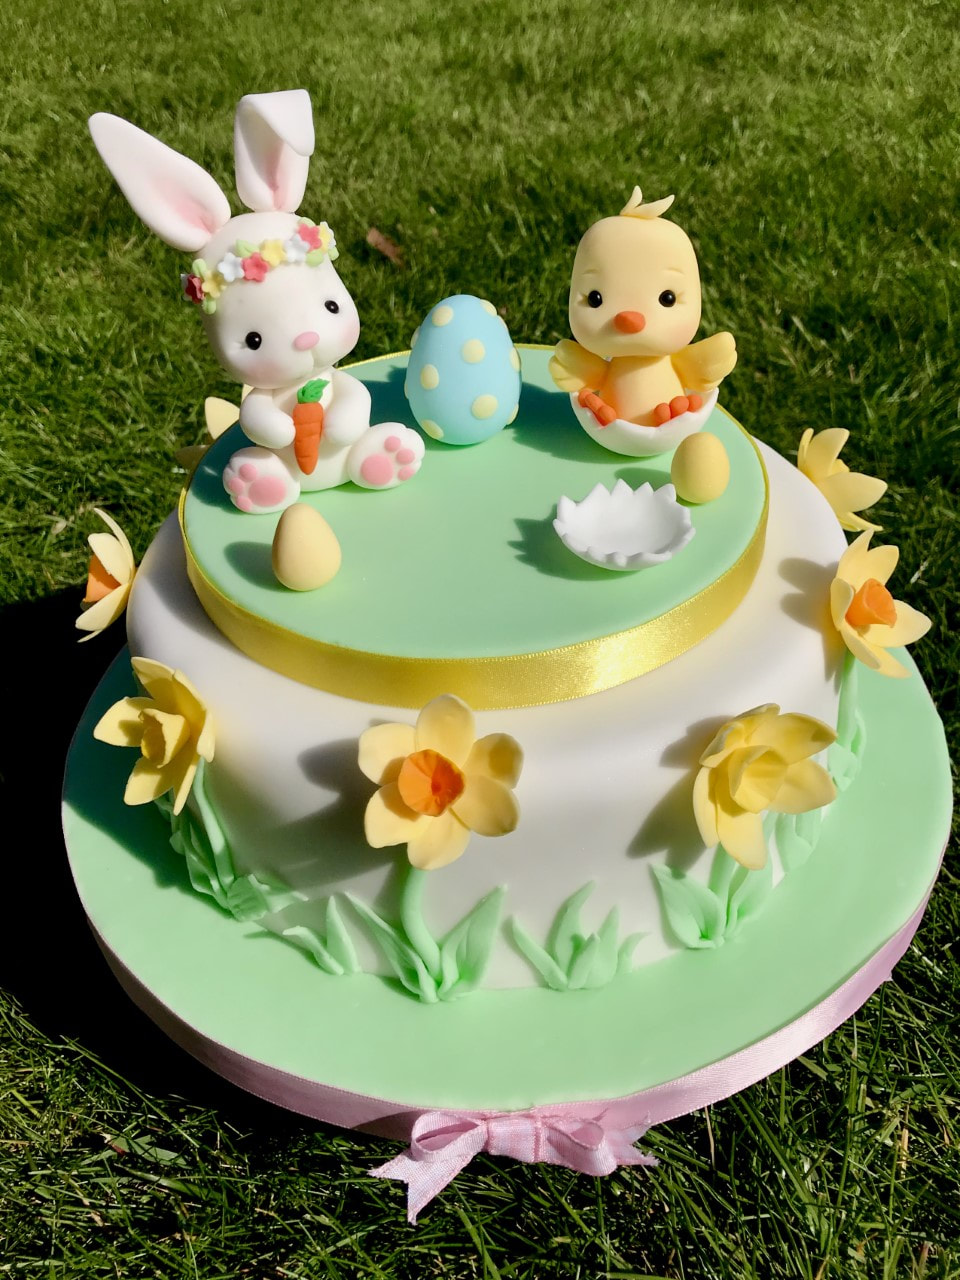
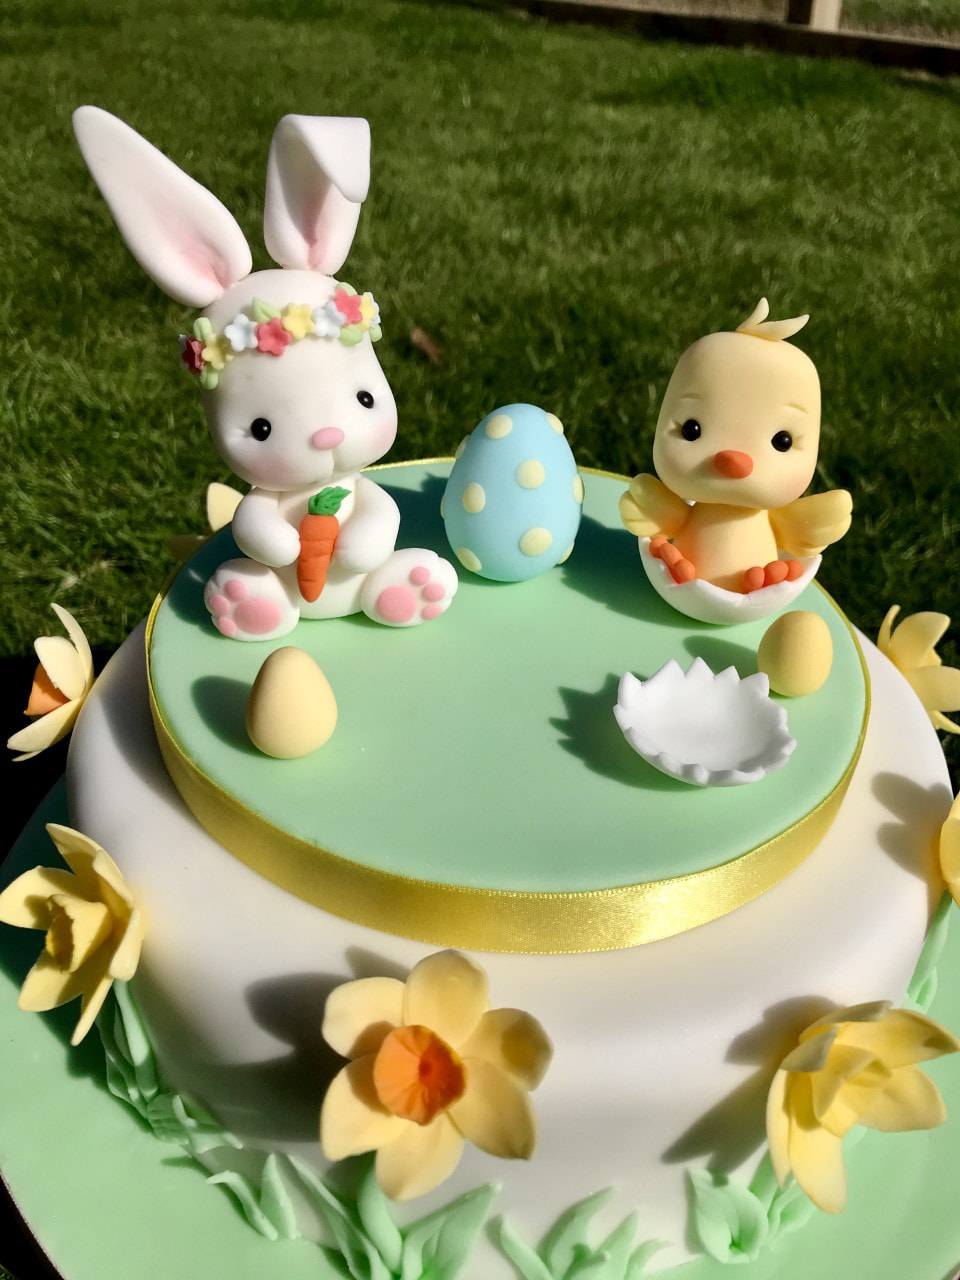
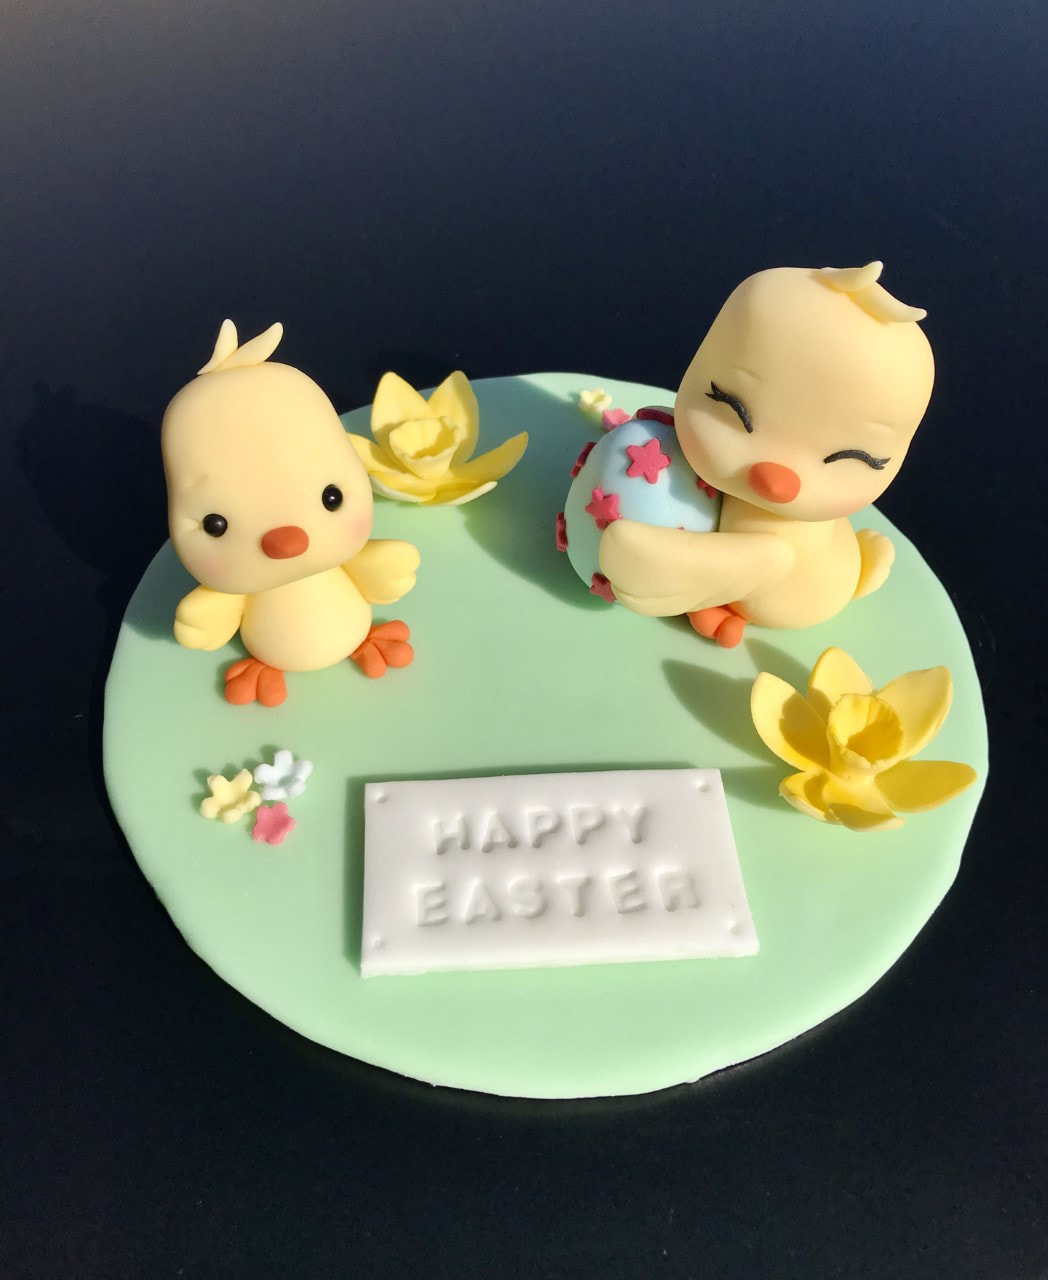
At our meeting in March we had the very lovely and entertaining Katie Hodgson doing her cute figures of an Easter duck and a teddy all reading for his picnic. All made from modelling paste.
We all thought that in our next meeting in April we may do a teddy as a workshop and have a go ourselves, such a long time since some of us have done any sugarcraft.
We all thought that in our next meeting in April we may do a teddy as a workshop and have a go ourselves, such a long time since some of us have done any sugarcraft.
Our February demo and mini workshop was done by Julie Jackson where she showed us how to make chocolate modelling paste. She then showed us how to made a woven basket with a few carrots and flowers. We then had a go ourselves to make the basket. Had an excellent afternoon, it was so long ago for some us not having done any sugarcraft over the last year or two.
Photo to come soon
Photo to come soon
This was our first demonstration for 2022.
January
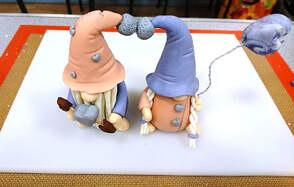
An excellent demo by one of our members Stephanie Nimmo, a Valintine's Gonk.
They were made from modelling paste and had solid bodies and hats, the beard was made by rolling thin strands of paste. The ladies plats were done in the same way then platted. Both hats were curved over to form a heart shape between them. The balloon was on a wire, but if the model is to eaten then dried spaghetti can be used.
January
An excellent demo by one of our members Stephanie Nimmo, a Valintine's Gonk.
They were made from modelling paste and had solid bodies and hats, the beard was made by rolling thin strands of paste. The ladies plats were done in the same way then platted. Both hats were curved over to form a heart shape between them. The balloon was on a wire, but if the model is to eaten then dried spaghetti can be used.
Some excellent work, covered chocolate oranges by Julie Jackson
Lovely photos of an Easter cake done by Nicola Hall.
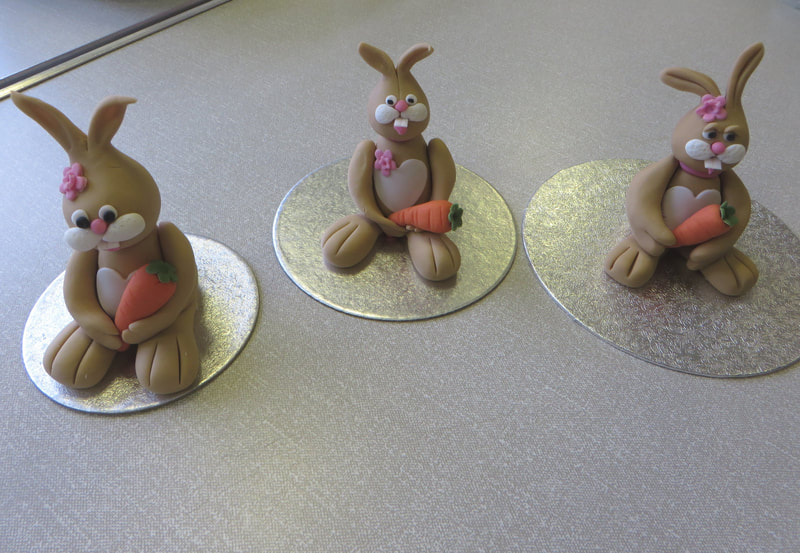
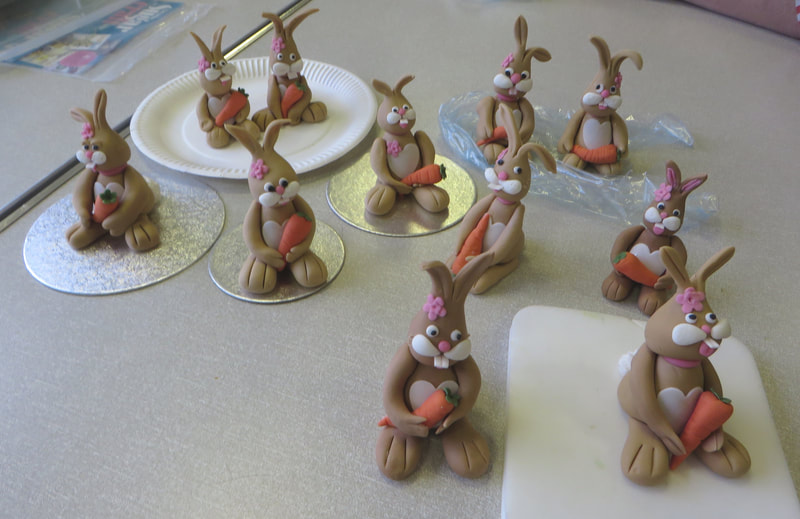
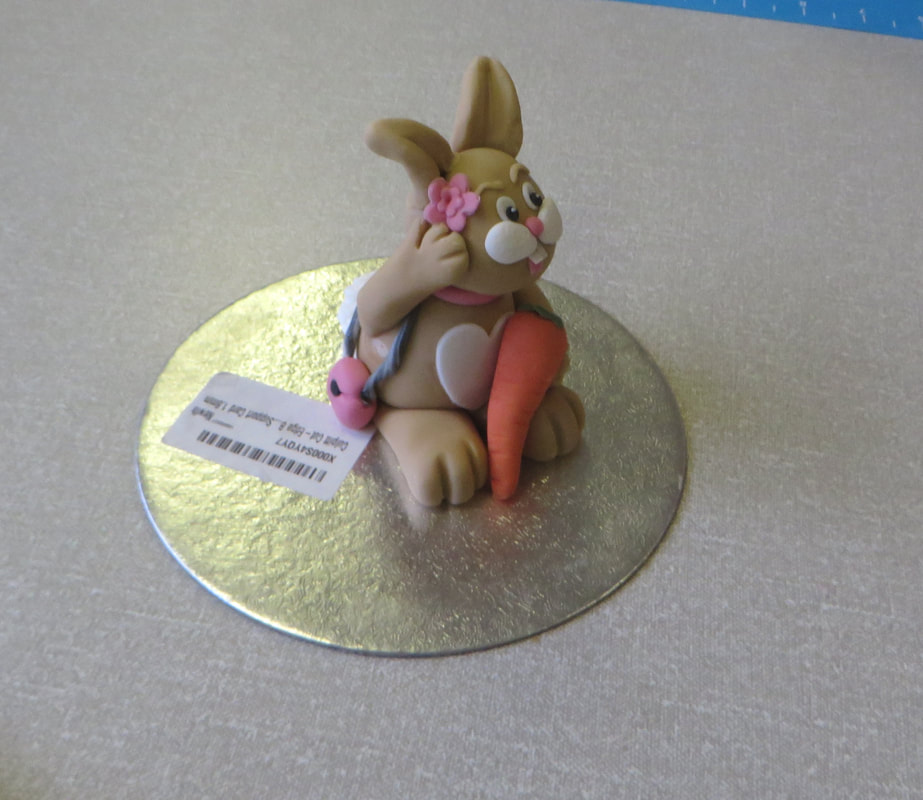
At our meeting in February we had Katie Hodgson doing a demo and a mini workshop creating an Easter Rabbit. What a great afternoon we all had watching her demonstrate, then making our own rabbit.
Using half modelling paste and half sugarpaste mixed together, firstly she made the body, then added the feet, The head was made by making a ball of paste then into a very long pear, dividing the long piece into ears. Then adding white chops, eyes, nose, mouth & buck teeth. To finish off made arms and the all important carrot.
The rabbits were multiplying by the hour Lol.

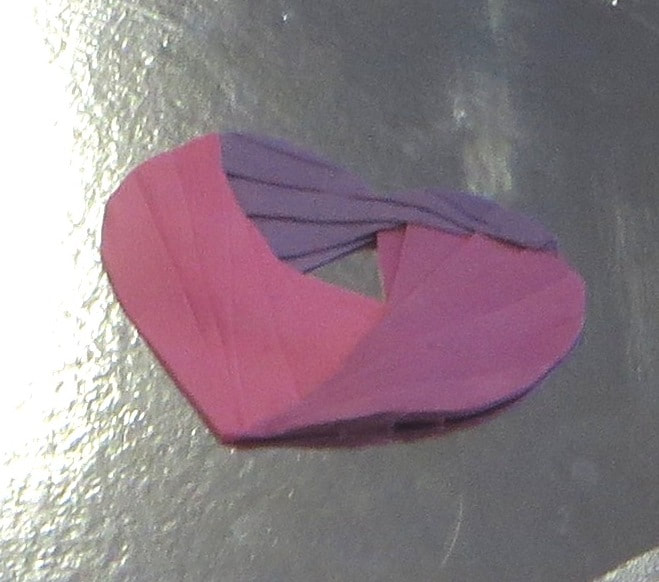
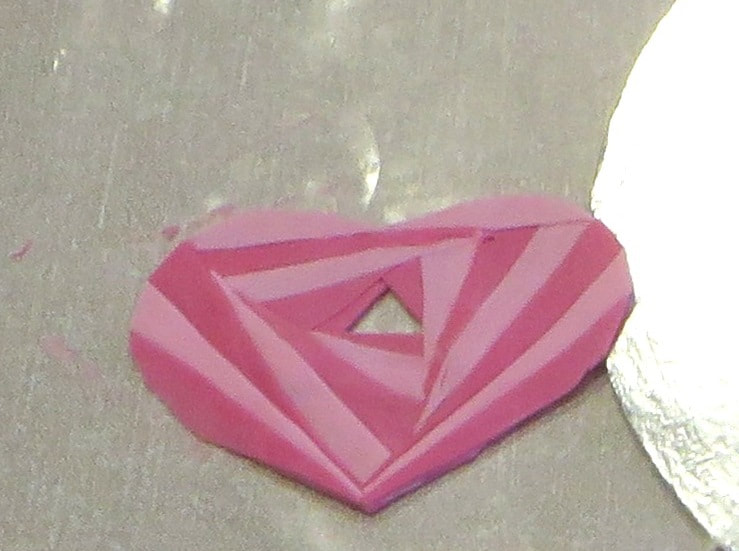
We got 2020 off to a flying start with our January meeting of an Iris Folding workshop. Iris folding is a paper craft, but can be done in sugarpaste. It represents the centre shutter (iris) in a 35mm camera lens, think 007 intro.
We had an Easter & Valentine theme going on with hearts, eggs & daffodils being made. The technique is actually done 'back to front' with the outer pieces being laid first & following round in a circular direction to create the pattern, its only when finished you can turn it over to reveal your handy work.
A great day of fun.

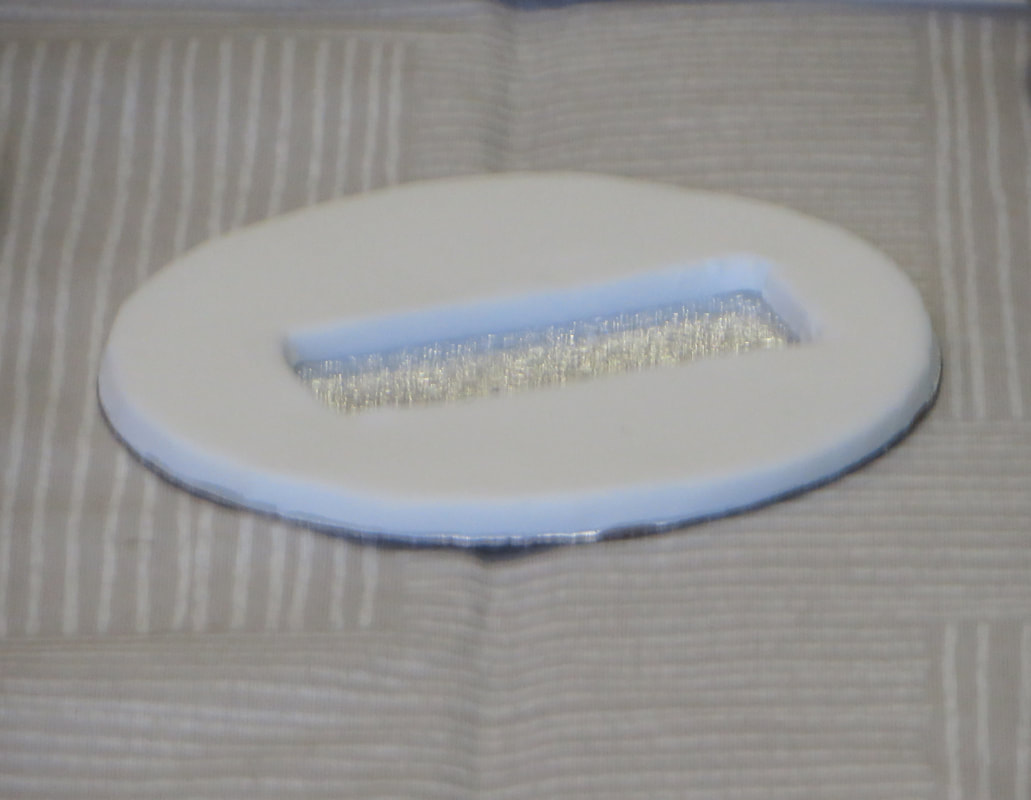
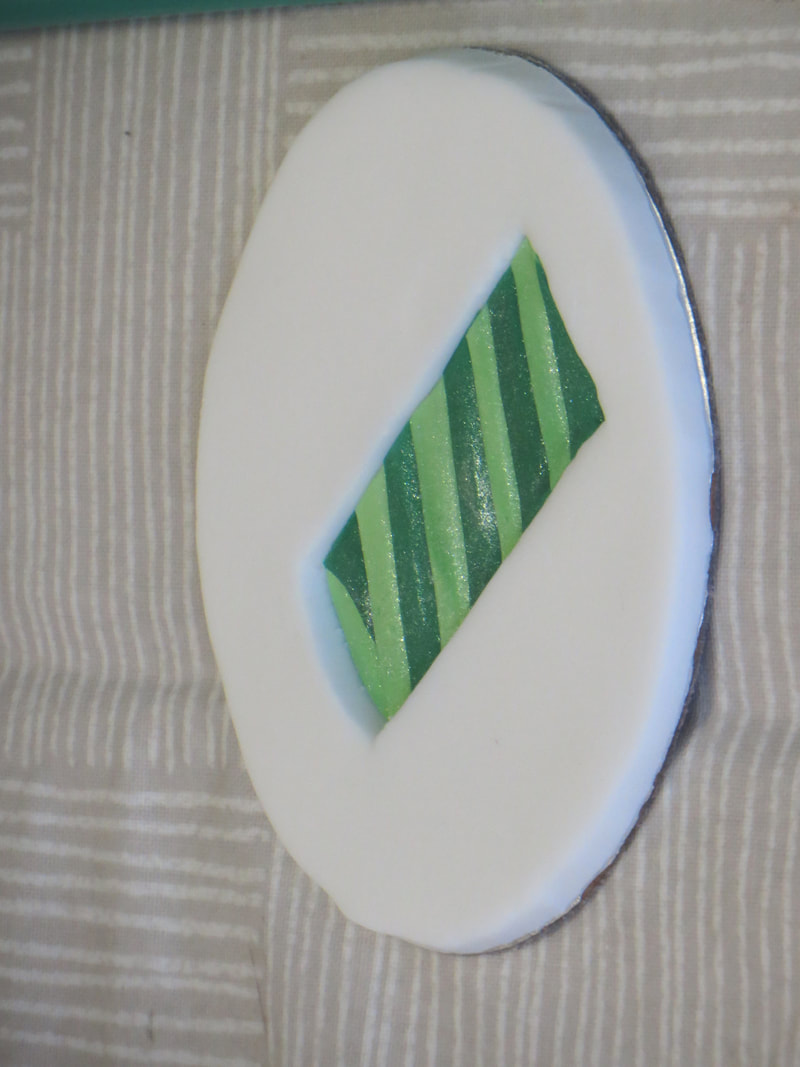
At our meeting in Nov 2019 we had Judith Lynn demonstrating various ideas for decorating your Christmas cake. What a great afternoon, she showed us how to do an 'iris folding' candle (a paper craft really, but works great in sugarpaste, using the same patterns). As the candle is thicker than paper a recess has to be cut from the icing to sink the piece in.
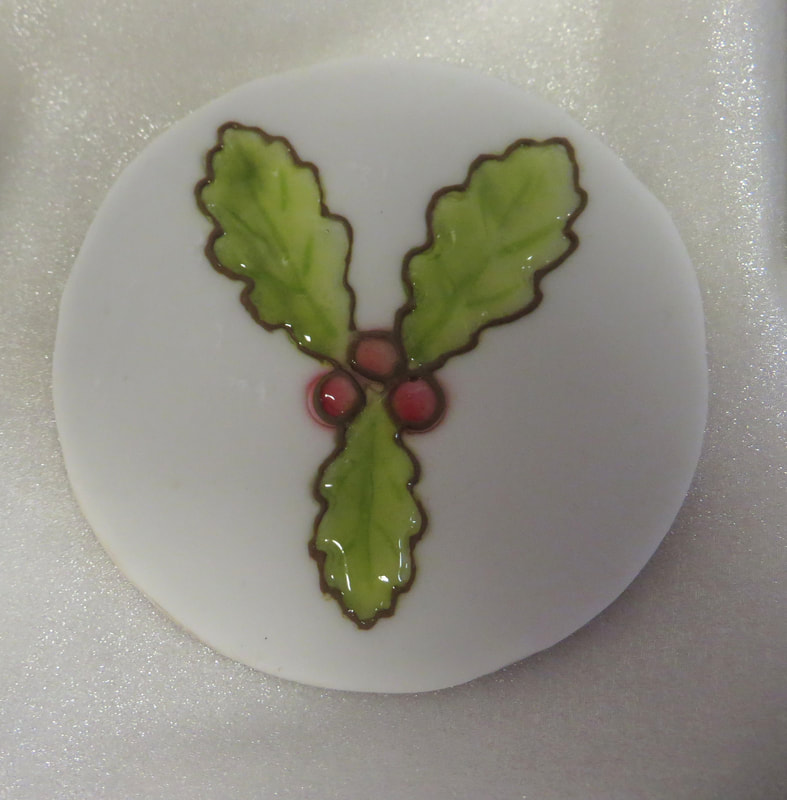
Next she showed how to do jelly painting by dusting an imprint of holly leaves, pipping around the edge with brown icing & filling it with either pipping gel or 'Roses' lime marmalade (has the same effect if you don't have the gel)
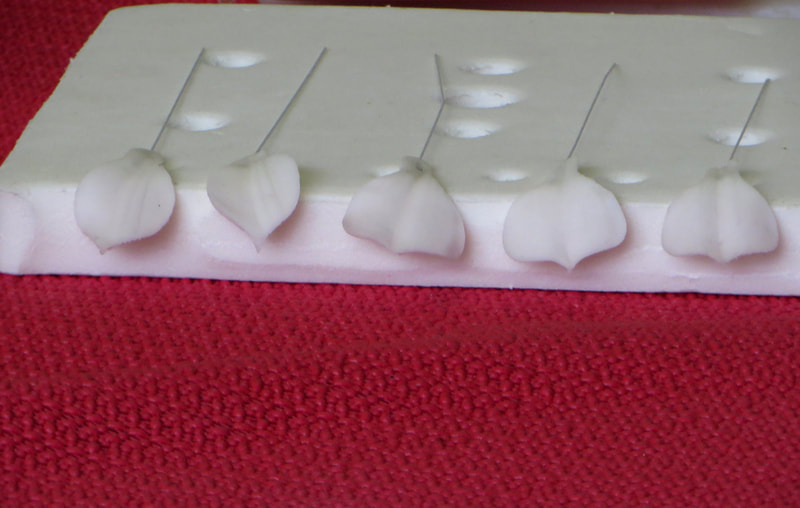
Next came the cute 3D snowman & infant A round ball of paste was flattened to form the head & body, then dressing him in a with a coat, hat was done the same method also the infant, adding his headphones. Lastly a little royal icing (or watered down sugarcpaste) snow at the bottom.
We had an excellent day and has rounded the year off nicely.
Next she showed how to do jelly painting by dusting an imprint of holly leaves, pipping around the edge with brown icing & filling it with either pipping gel or 'Roses' lime marmalade (has the same effect if you don't have the gel)
Next came the cute 3D snowman & infant A round ball of paste was flattened to form the head & body, then dressing him in a with a coat, hat was done the same method also the infant, adding his headphones. Lastly a little royal icing (or watered down sugarcpaste) snow at the bottom.
We had an excellent day and has rounded the year off nicely.


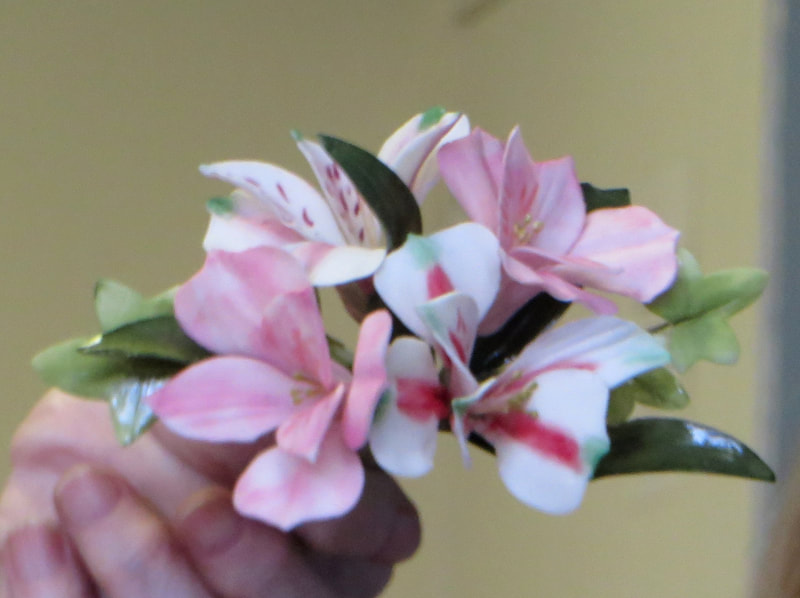
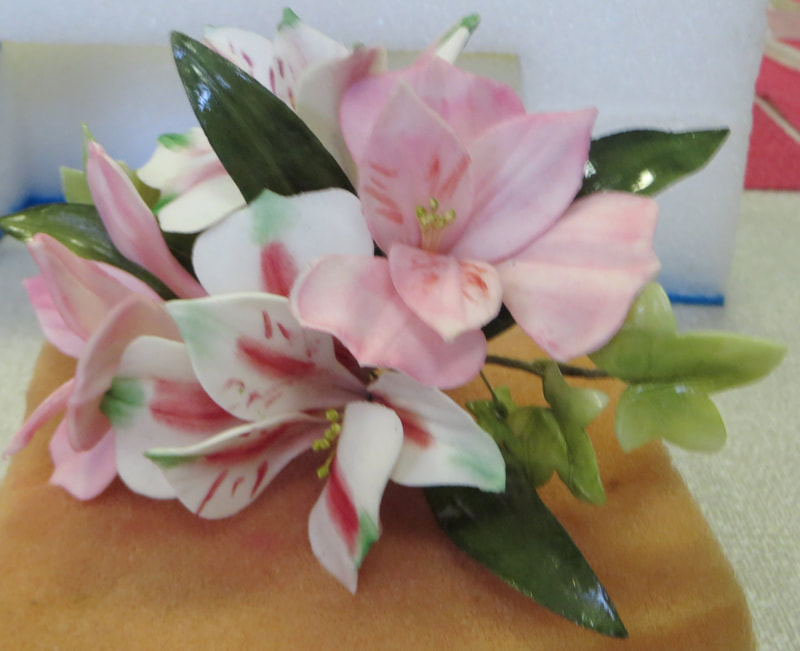
Our meeting in Oct we had the wonderful Andrea Henderson, who is one of our qualified demonstrator members, she showed us to make beautiful Alstroemeria sugar flowers. All the petals are made out of flower/petal paste and attached to wires, then making the centre with stamens, colouring these and the petals as you go while the paste is still pliable. This helps when making up the flowers as the petals can mould better together and avoids them breaking at the base. She then arranged them in to a lovely spray, adding leaves.
We all had a brilliant afternoon, come and join us for the next meeting.
We all had a brilliant afternoon, come and join us for the next meeting.
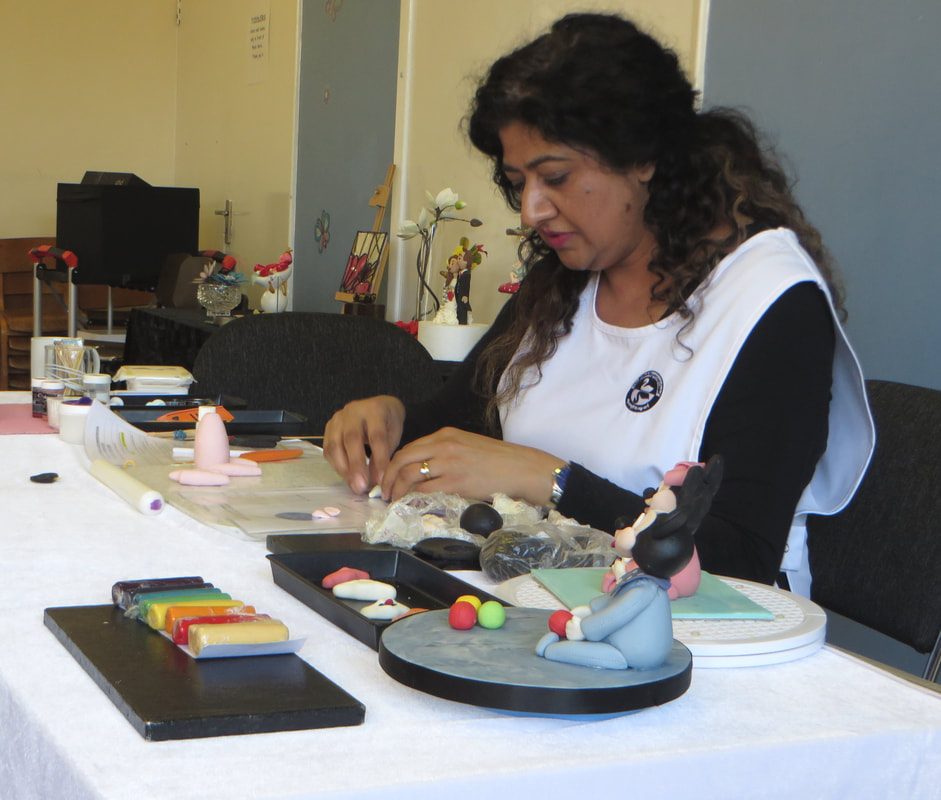
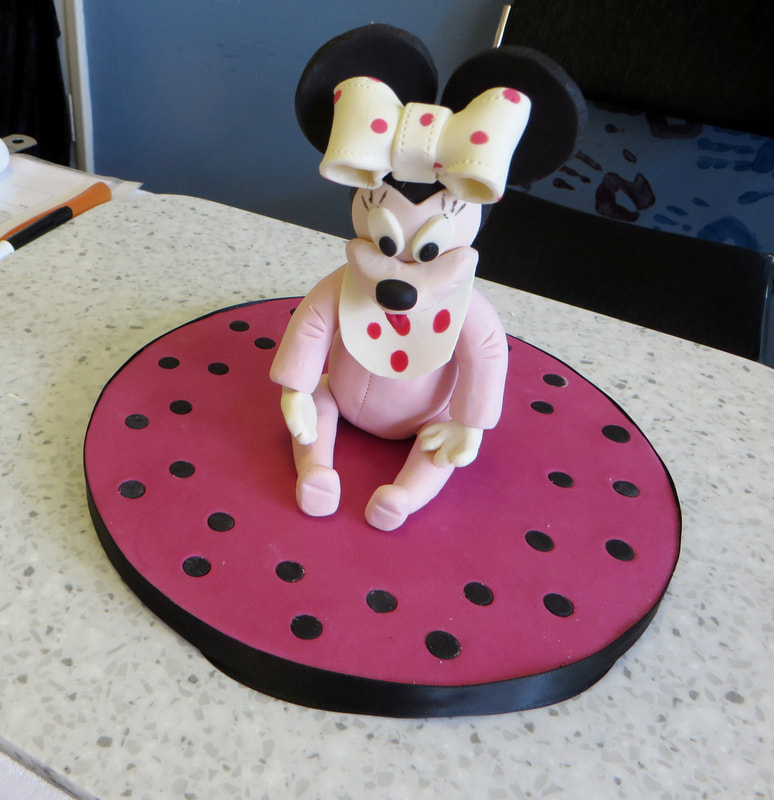
At our meeting in Sept we had the lovely Saheda Lally again. Still working in chocolate modelling paste that she makes herself, this time she made Mini Mouse. First making the ears, as they had to dry (but better made the day before) Gave us more tips on how make the head without it getting it flat at the back, also how to do the tricky face features that Mini has.
Another great afternoon.
Another great afternoon.

In the meeting in July, Katie Hodgson did a model of a gardener. She showed us how to use three rolls of paste & to keep folding them to create the bark effect on the trunk of the tree. Also gave us different ideas on how to make various face models by hand. It was a very entertaining afternoon.


Our meeting in June we had Leslie Dalton doing brush embroidery, sorry haven't any details or photos at the moment
At our May meeting we had Saheda Lally showing us how to make our own Chocolate Modelling paste, she gave us lots of tips on how to make, colour & keep. She then made roses & other flowers, models and so much more.
What a great demo, everyone is looking forward to her coming again in Sept with some more interesting things to do - so if you don't want to miss it again, make a date.
What a great demo, everyone is looking forward to her coming again in Sept with some more interesting things to do - so if you don't want to miss it again, make a date.
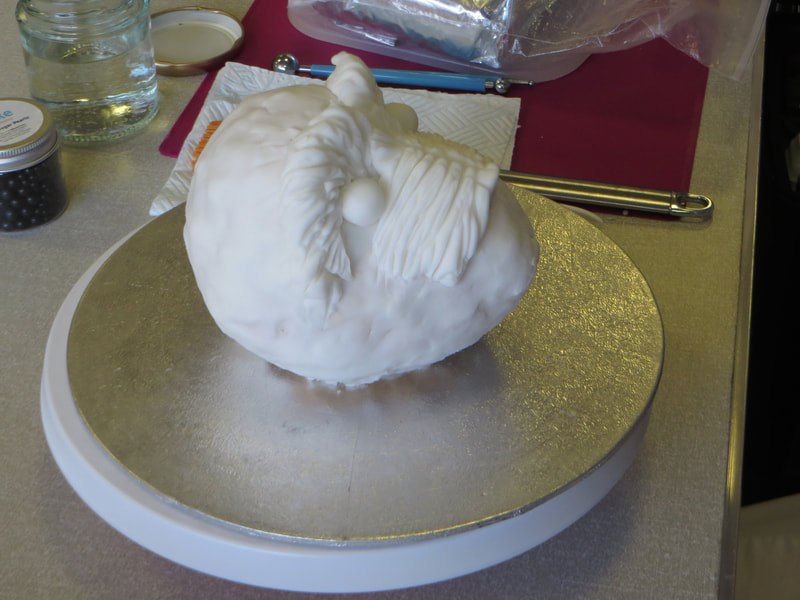
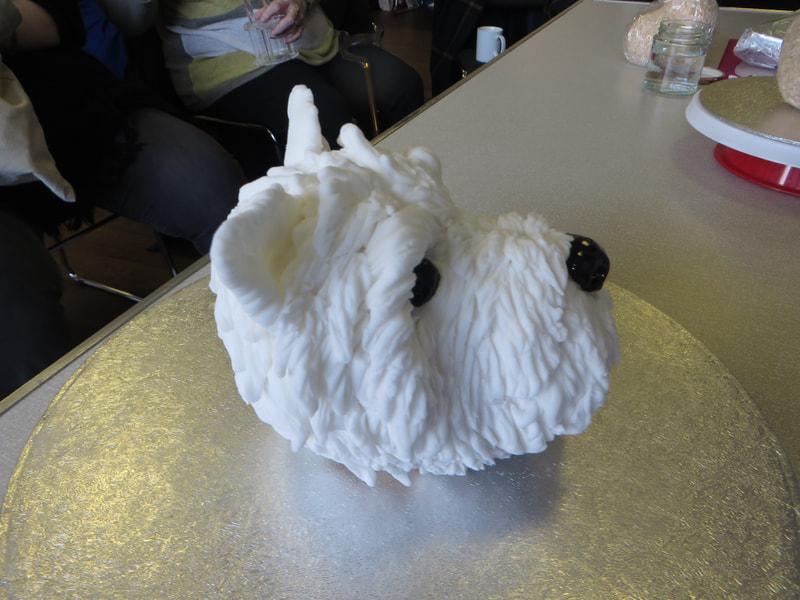
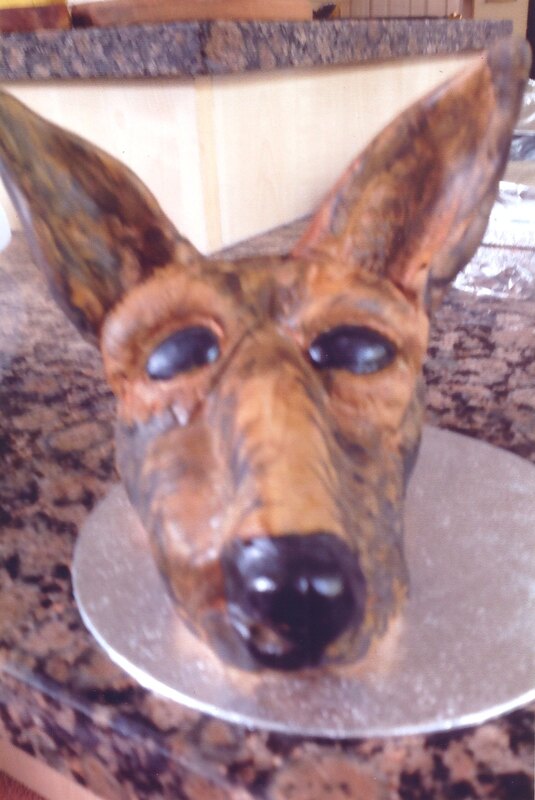
Our April meeting was a 'hands on' workshop where we were creating our own animal head as Nicola had shown us in the February meeting. We all had a really enjoyable time with fun & laughter at our creations.

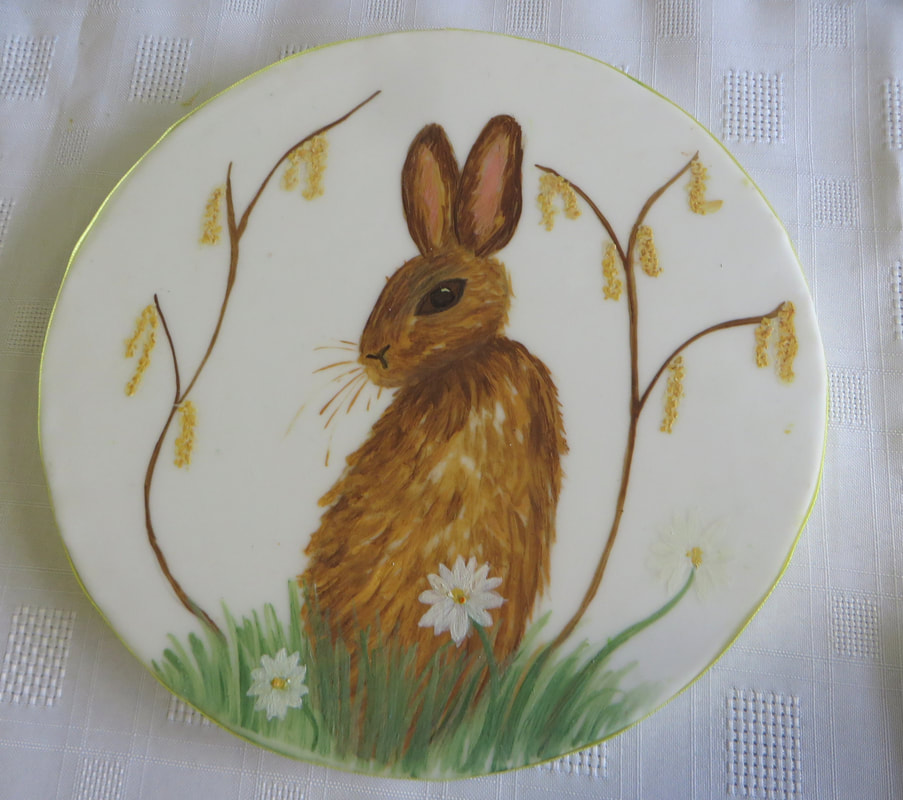
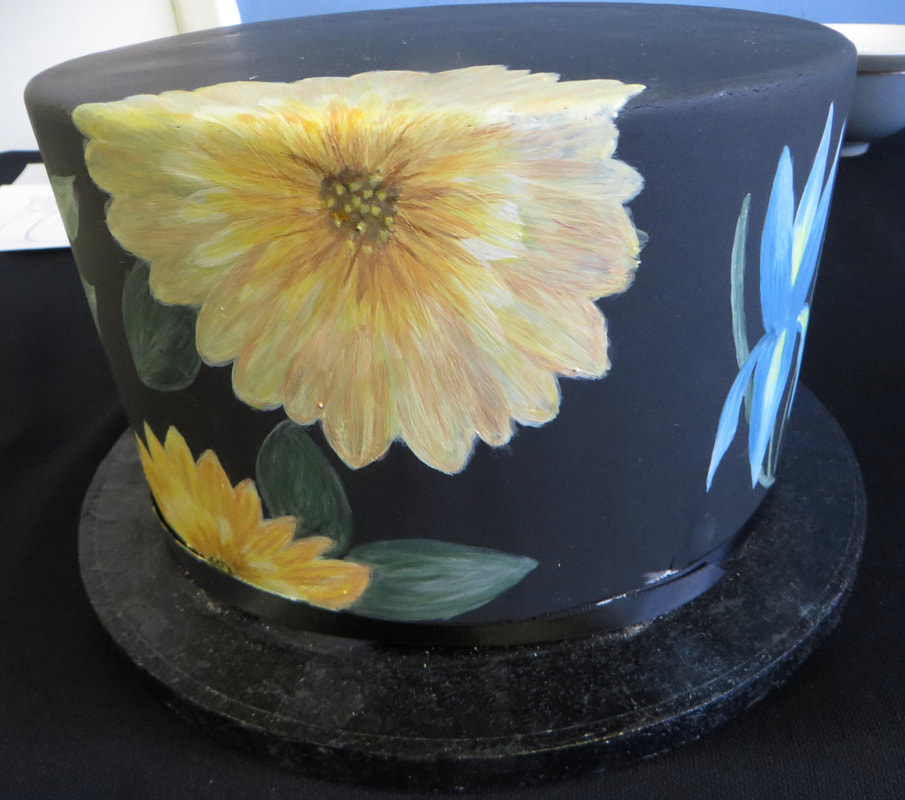
March meeting we had Gill Guillet to show us how to do Coco Butter Painting. She gave us plenty of inspiration on where to find pictures and how to transfer them to an icing plaque or iced cake. Some good tips on how to paint with coco butter and coco powder or coloured powders. A great afternoon. Thanks Gill
Did you miss it, join us at our next meeting.
Did you miss it, join us at our next meeting.

At our meeting in February we had Nicola Hall modelling an animal head from crispy cereal & marshmallow mixture to shape the basic head shape. She then showed how to build up the structure with sugarpaste icing. A wonderful demonstration.